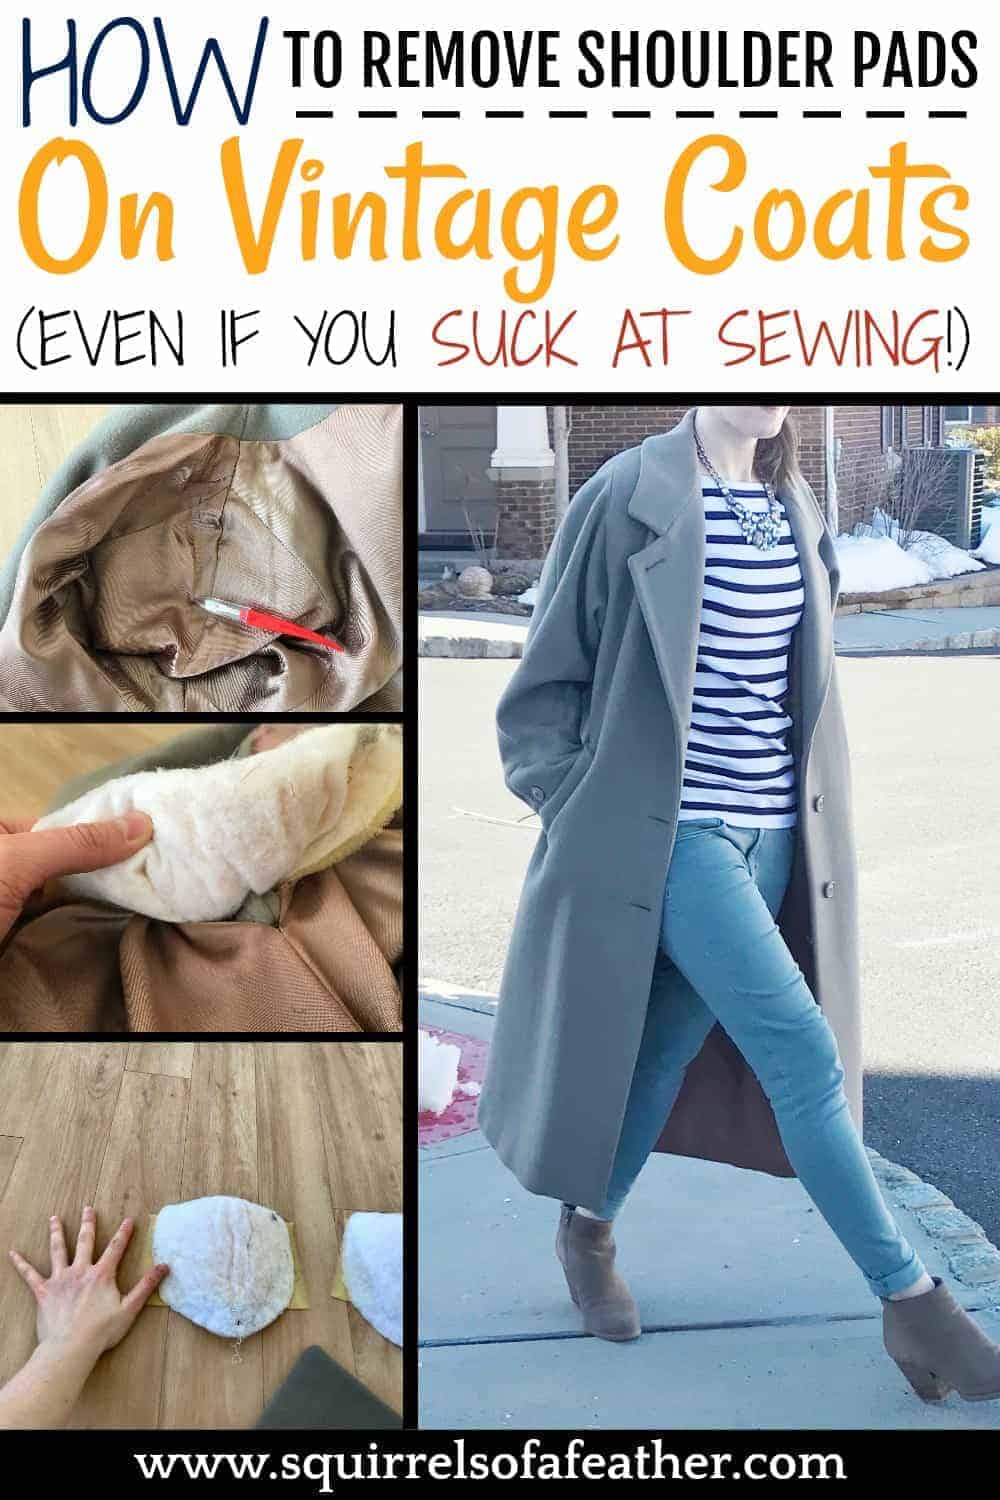
How to Remove Shoulder Pads and Update Vintage Coats
This post may contain affiliate links for your convenience. That means that if you make a purchase, I will receive a small commission at no extra cost to you. Read more here.
So you’ve found the PERFECT vintage coat — except those shoulder pads have you feeling stuck in the ’80s? Never fear! I am going to show you how to remove shoulder pads, so you can update your gorgeous vintage finds and bring them into the present!
This shoulder pad fix is so simple, even people with zero-to-non-existent sewing skills can do it! Read on to find out how.
This post may contain affiliate links for your convenience. That means that if you make a purchase, I will receive a small commission at no extra cost to you. Read more here.
How to remove shoulder pads — and why you should!
Y’all, I am a big fan of eBay! Not only did I make $15,000 selling my old clutter on eBay, but I find GREAT DEALS on everything from kids’ toys to coats there.
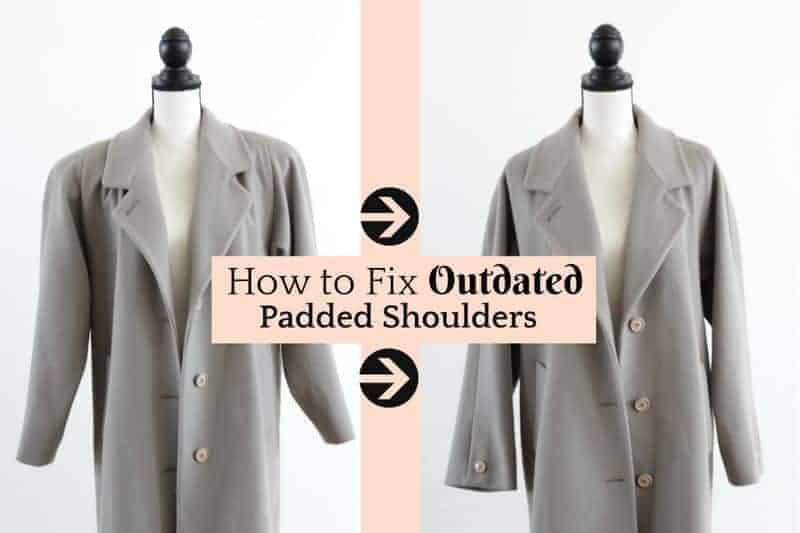
Take this camel coat, which I got from eBay for $29 (shipping included!). It was a steal, but I was decidedly NOT in love with the padded shoulders.
I called my go-to dry cleaner/tailor and she told me that it was going to cost me $40 to take out the pads, as she would have to open two seams and get into the lining.
Say whaaaat? That’s more than I paid for the coat!
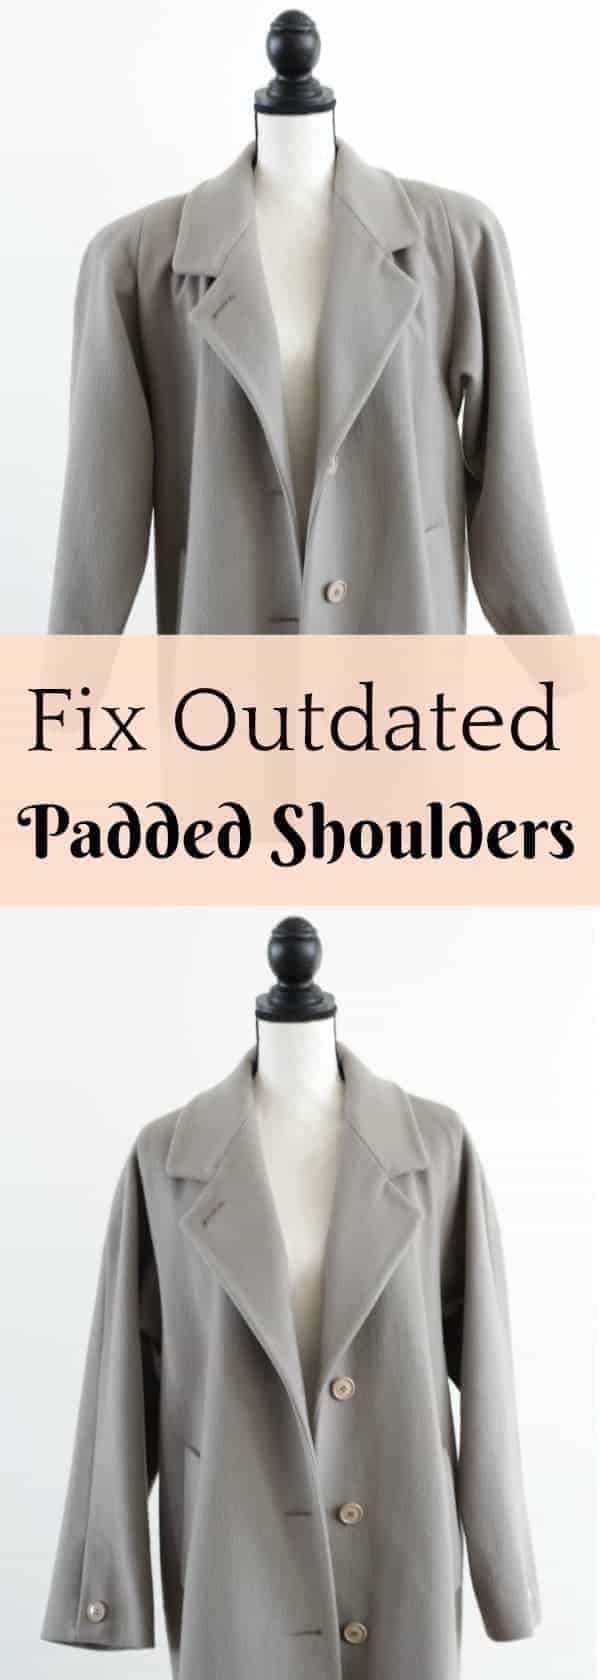
So I decided to do it myself, and if I am able to do it, I know that you can too! Check out that before and after shot!
Supplies to remove shoulder pads
Here are the supplies you will need to remove shoulder pads from lined coats, jackets, etc:
- A coat
- A seam ripper
- Smallish sewing needle
- Thread to match coat lining
Removing shoulder pads
Step 1: Examine your shoulder pads
Before you go ripping your coat lining open, take a look at your shoulder pads. Can you move them around? Flip them under? Are you able to get an idea of what it might look like if you change/remove them?
Some coats may actually look better with a little padding. You might choose to cut out only part of the padding.
Depending on where the pads are attached, you might even be able to get away with folding the pads under and then just sewing them in place through the seam without opening the lining.
If that is unfortunately not your coat, move on to Step 2.
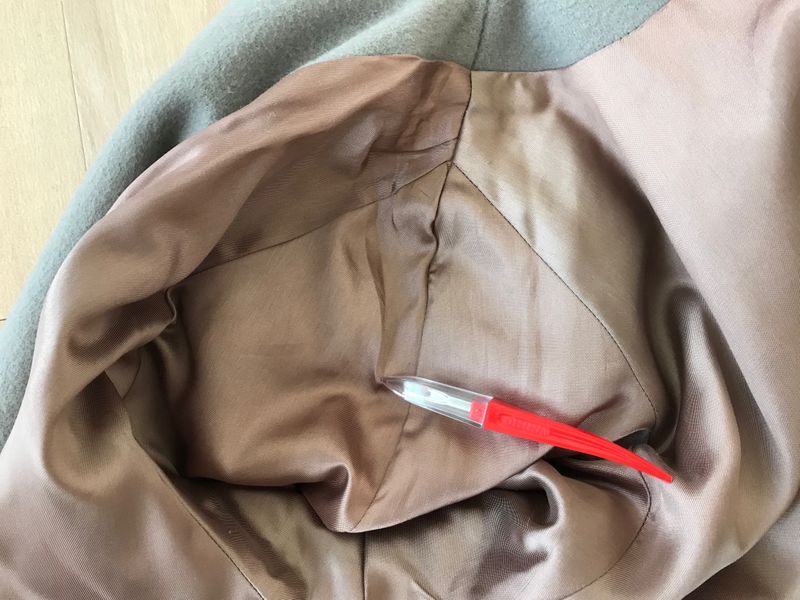
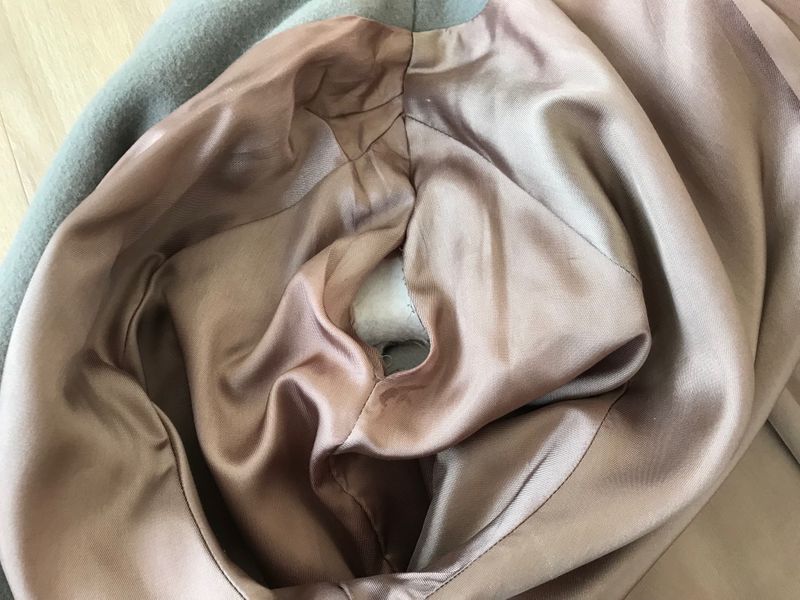
Step 2: Open a seam
Lay your coat on the floor and decide which seam to open.
For this particular coat, the best seam was located directly under the shoulder pad (so if I were wearing the coat, it would be the seam TOUCHING my shoulder at the top, slightly down the arm, towards the elbow).
Don’t make the hole too big, it should be just large enough for you to be able to get your fingers in there and pull out the padding for inspection and removal.
Also, try not to open a seam at a junction where several seams come together…that just makes more work for you!
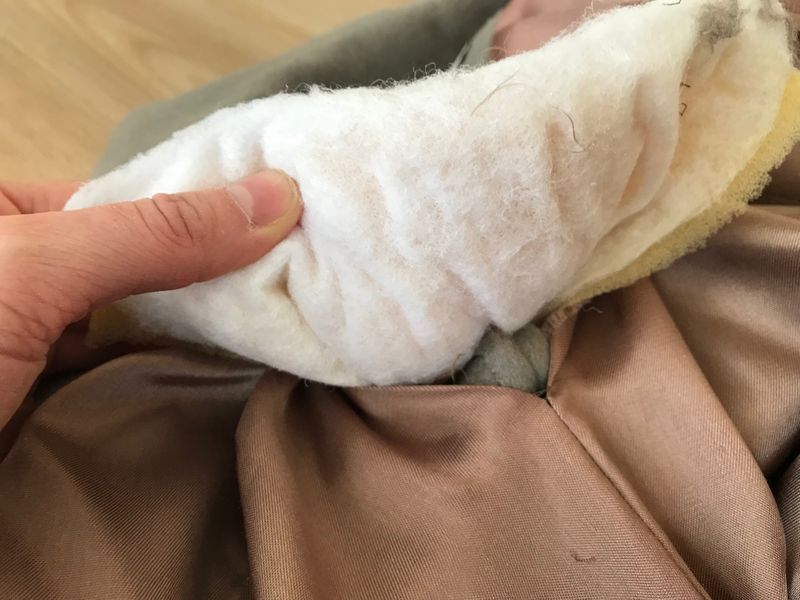
Step 3: Examine the shoulder pad
First, check and see how the shoulder pad is sewn in. If it is sewn into the lining itself, it may be better to cut the padding off AROUND the seam and leave the sewn part in place, so you don’t have to sew that part back together.
You don’t want to risk opening seam that would be visible to the outside of the coat.
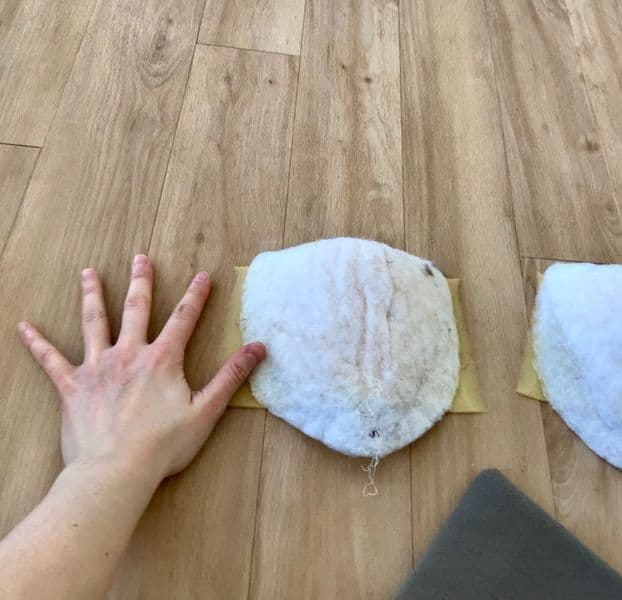
See in the images below how I inspected the shoulder pad and found the point of attachment that held them to the coat’s interior.
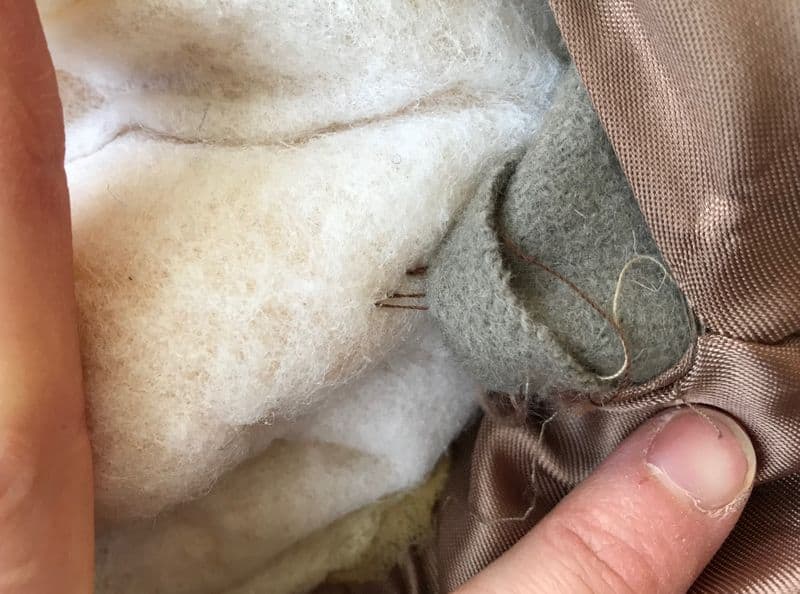
Step 4: Remove the shoulder pads
My coat was anchored in place by only a few threads, so I simply used my seam ripper to detach it from its place and remove it completely from inside.
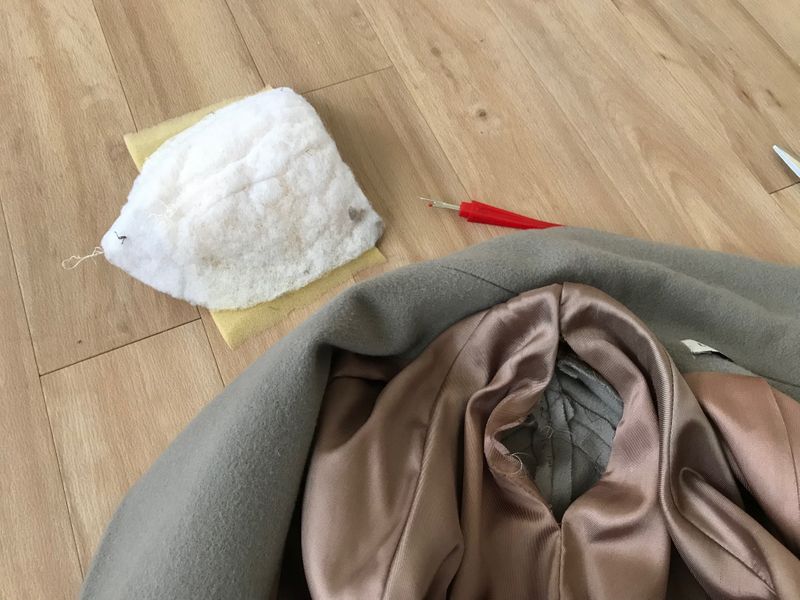
Check out these pads! They are bigger than my hands!
Step 5: Repeat on the other side
Now that you have removed the shoulder pads on one side, repeat the same steps for the second side. It should be easier now that you have done it once.
Try on your coat and make sure you are happy with the results before you move to step 5.
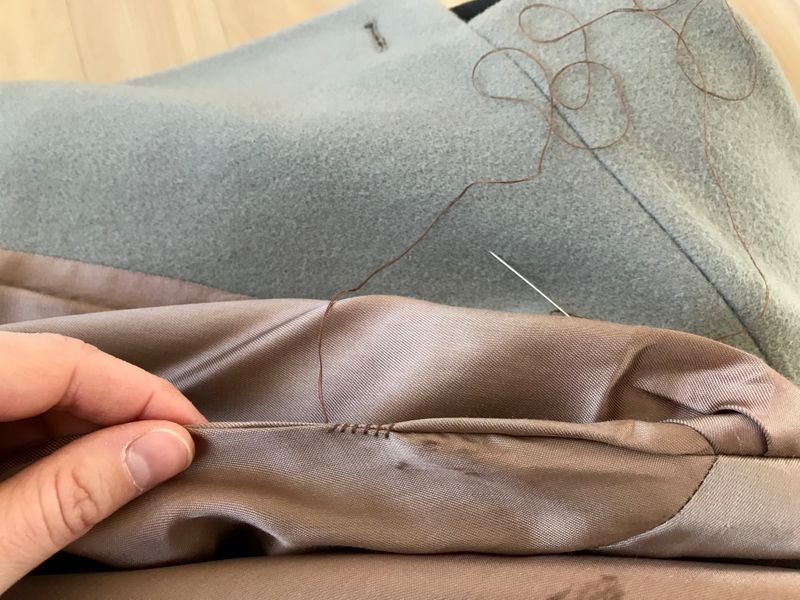
Step 6: Sew the seams closed
This is the only part that requires sewing and it is easy peasy!
Take your needle and your thread matching the lining of your coat and thread it through, tying it with a double knot at the bottom so that the thread is doubled. (I gave myself an arm’s length of thread to work with, and I was able to use that to more than cover sewing both sides.)
You should be able to see where the lining was previously folded over and sewn together. Try to press it back together so that the same holes line up and using a whip stitch, sew the seam closed.
If you aren’t familiar with a whip stitch, check out this Youtube tutorial, which is the one that I viewed.
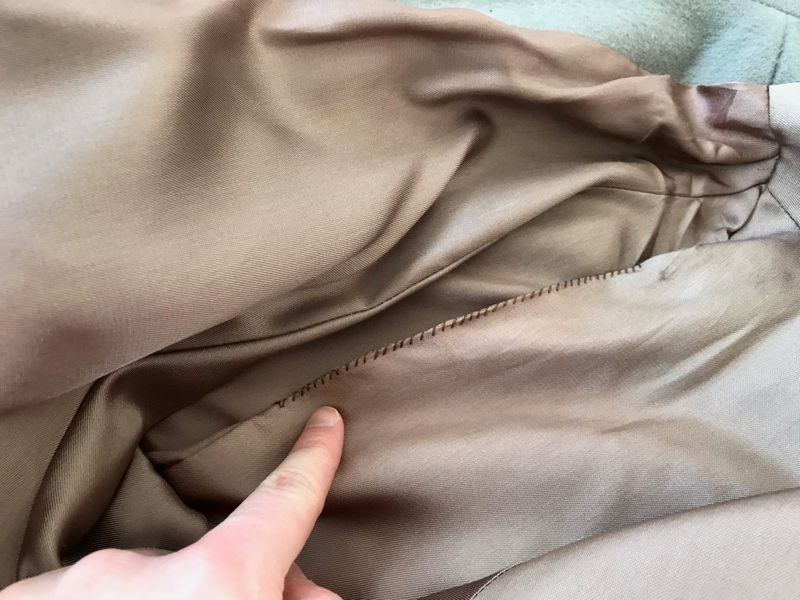
Step 7: Repeat
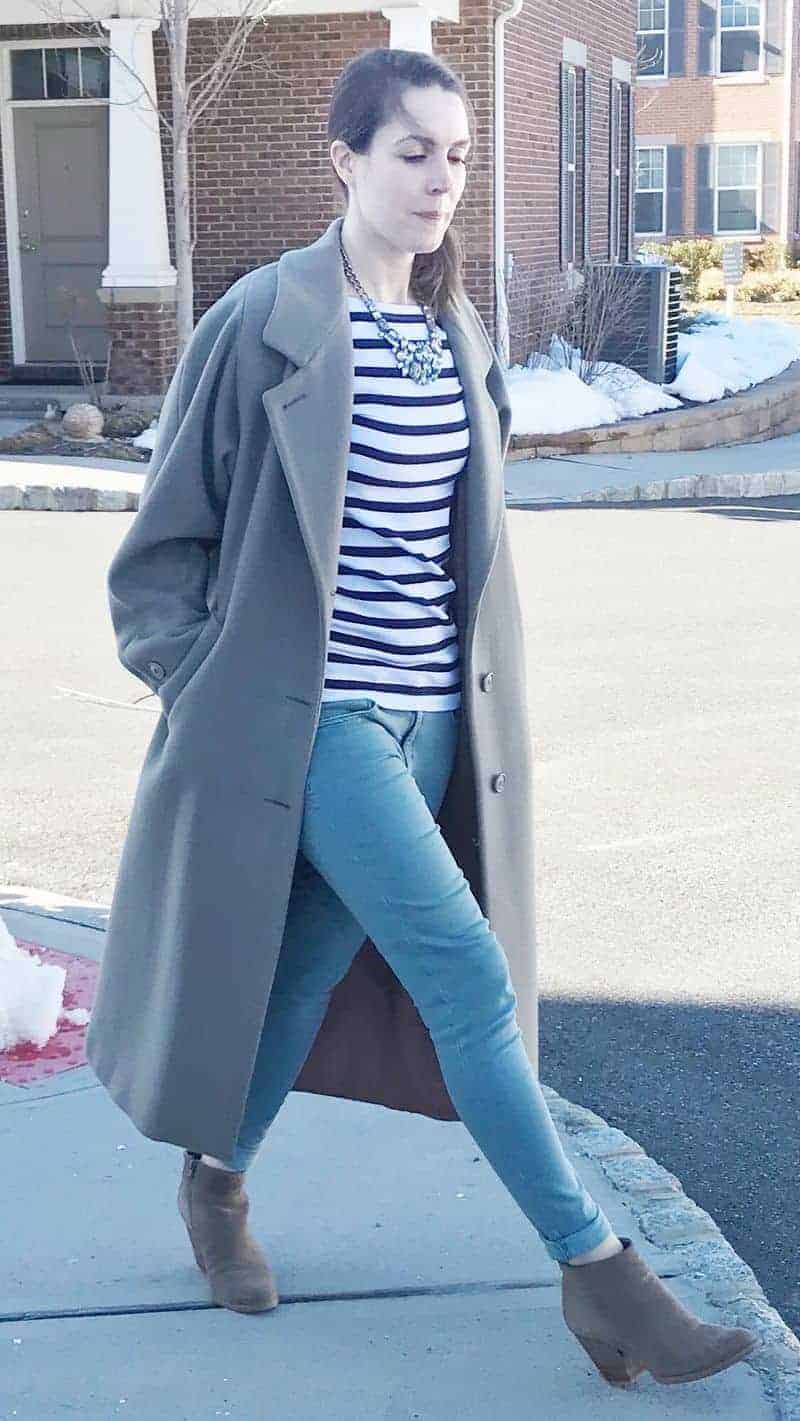
Sew the other arm seam closed on the opposite side and you are done! Now try on your coat, marveling at the fresh feel!
Here is what my coat looked like after sewing the opening closed with the whip stitch!
Pin this tutorial!
Great post, and so helpful, Marissa! Perfect for the beginner seamstress! 😉
Thanks Julie, I will be glad if I can help someone else with their vintage wool coat addiction ?
Thank you! I came here before doing this today. Just like yours it was a (GREAT) EBay purchase, but needed shoulder pad surgery. Now I am so in love with my coat. Lining stitched back up easily and neatly.
Ooooh, I would love to see it, Harriet! If you are on Instagram post it and tag me @squirrelsofafeather and I will share it in my stories! I love a good eBay find. Bravo!
Hi. Great post. Got any ideas to fix the puffy shoulders after the pads are removed? I thought removing the pads on a leather coat with raglan sleeves would be enough but the shoulders still look big. (Better than before, that’s for sure.)
Hey Cinthia! That is a tough question, because of the way raglan sleeves are formatted I think it would be hard to modify without cutting, which I would worry about doing at home with leather. I would probably leave it, better slightly oversized than risk messing it up entirely! Sorry I couldn’t be more helpful!
This article was so helpful! I just updated my great vintage find following your directions. It worked perfectly, and now I love my”new” jacket!
Woohoo, so excited for you, Colleen! Thanks for letting me know. 🙂
Great guide! Got a vintage 80s Perry Ellis coat at a yard sale but the shoulder pads were insane. Clean removal and it’s looking gorgeous!