How to Make a DIY Necklace Holder to Organize Your Jewelry
This post may contain affiliate links for your convenience. That means that if you make a purchase, I will receive a small commission at no extra cost to you. Read more here.
Necklaces are meant to make you feel beautiful! Don’t they deserve a space that allows them to shine, even when they are being stored? That’s why this DIY necklace holder is the perfect solution to your necklace storage woes — it’s easy to make, super affordable, and results in a stunning necklace storage piece that turns your gorgeous statement necklace into equally stunning and functional statement wall art.
Find out how to make a gorgeous DIY necklace holder, today!
DIY Necklace Holder to Organize Jewelry
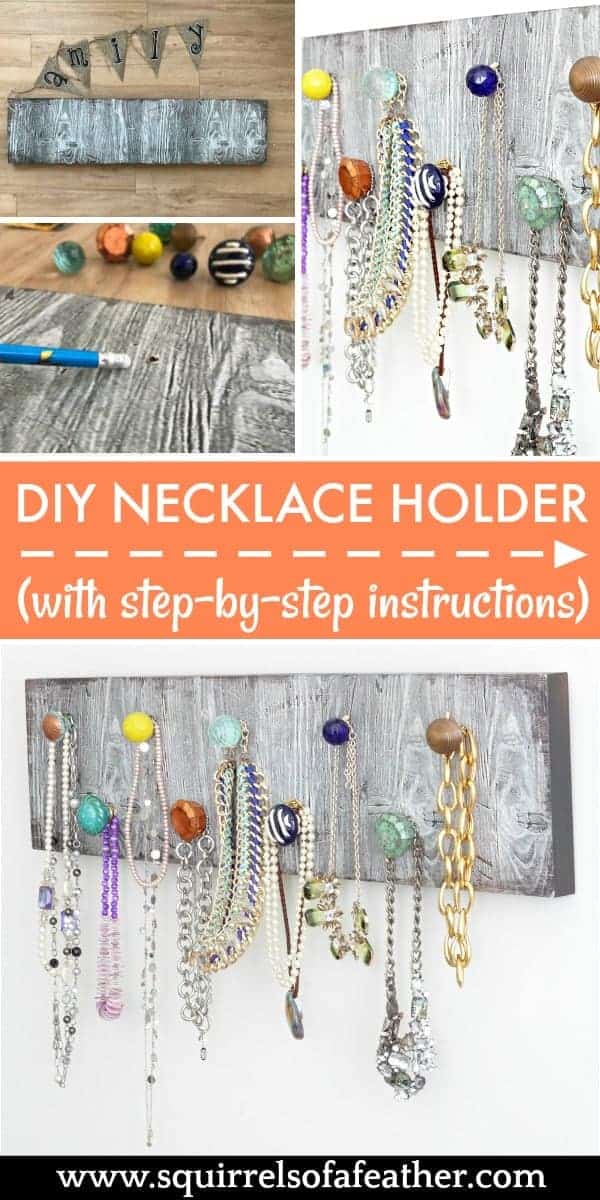
Would you believe that this DIY necklace holder started out its life as a trashed farmhouse sign?
I literally found it at our townhouse community’s trash and recycling center, ready to be discarded.
The sign is faux wood in an appealing rustic grey and originally had a length of twine holding a burlap triangle banner that read “family”.
The twine that had anchored the sign had broken and the “f” from “family” was missing.
(Of course, I was able to piece together that is what it was supposed to read from my long background as a couch-surfing participant of Wheel of Fortune).
I had been looking for a creative way to store my statement necklaces and the moment I saw this discarded sign I knew it was PERFECT for a DIY hanging necklace organizer.
I just had to whisper to it a bit.

This post may contain affiliate links for your convenience. That means that if you make a purchase, I will receive a small commission at no extra cost to you. Read more here.
Making a DIY Necklace Holder
Don’t think for a moment that just because this sign was an upcycled piece that you can’t replicate this DIY necklace holder yourself!
Take a look around your home and see if you have any long rectangular art pieces that you don’t love anymore.
Any wood or faux wood rectangle can be turned into a necklace holder.
You could also look at the thrift store or purchase a length of wood from Home Depot, Lowe’s, or even get specialty wood from Etsy shops!
Shop around and find what fits your style and budget.
*Keep in mind the length of the knobs when you are choosing your wood and drilling your holes.
If your piece is not deep enough the screws on the knobs might extend past the length of the wood and make it harder to mount on the wall. Measure the depth of the wall holder and the length of the knobs to know if they are a good fit.
How to Make a DIY Necklace Holder
Here is how to make a DIY necklace holder to help store and organize your necklaces.
Step 1: Measure the necklace holder
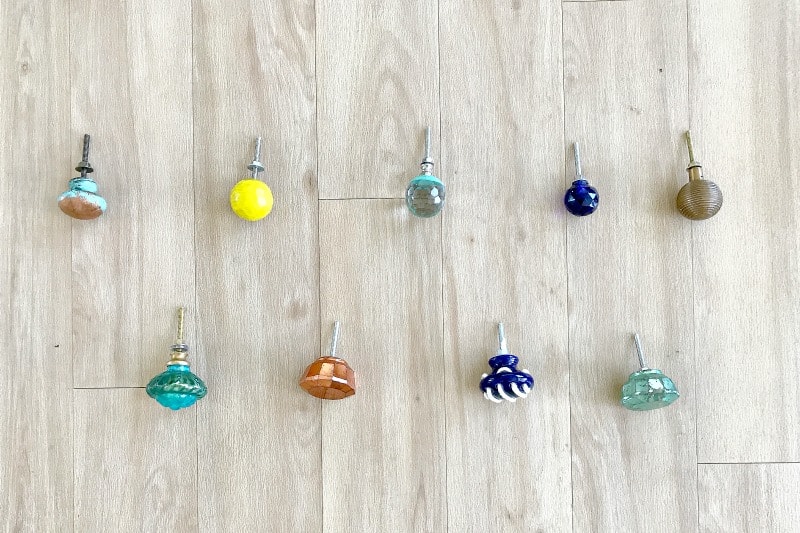
Before you start buying knobs and working on your sign, you need to have an idea of how many knobs you will need.
Depending on the size of your sign and your own personal preferences you might use more or fewer knobs. I decided to use nine total for my sign, which was 32 inches by 8 inches.
Measure the length and the width of your sign.
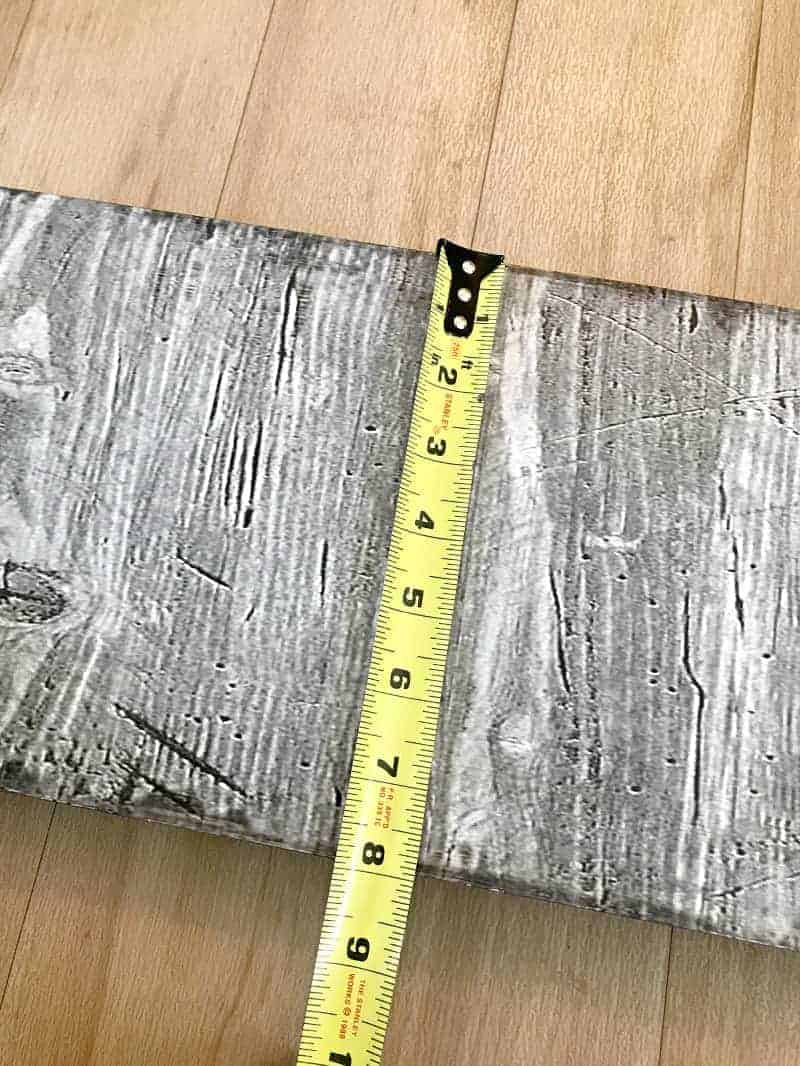
If you are doing one single row of knobs, all you need to do is divide the width (the narrowest portion which will be measured top to bottom) by two.
If you want to have two rows as I do, take the vertical measurement and divide it by three. Mine was 8/3 = 2.667, which means that I would need to space my holes every 2 2/3 inches.
For the length, take the total distance and divide by the number of your knobs PLUS ONE (which takes into account the extra distance needed on each side of the holes). Mine was 32 inches, therefore 32/10 = 3.2, which means that I would space the knobs across every 3.2 inches.
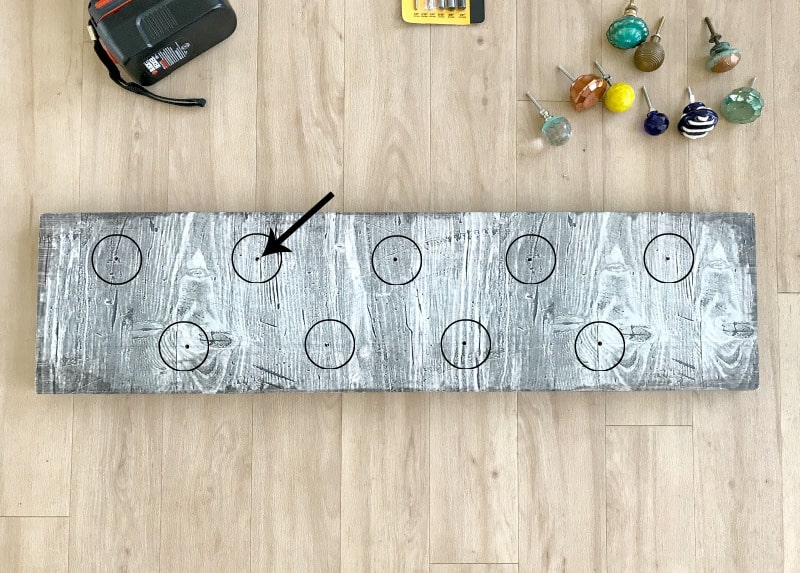
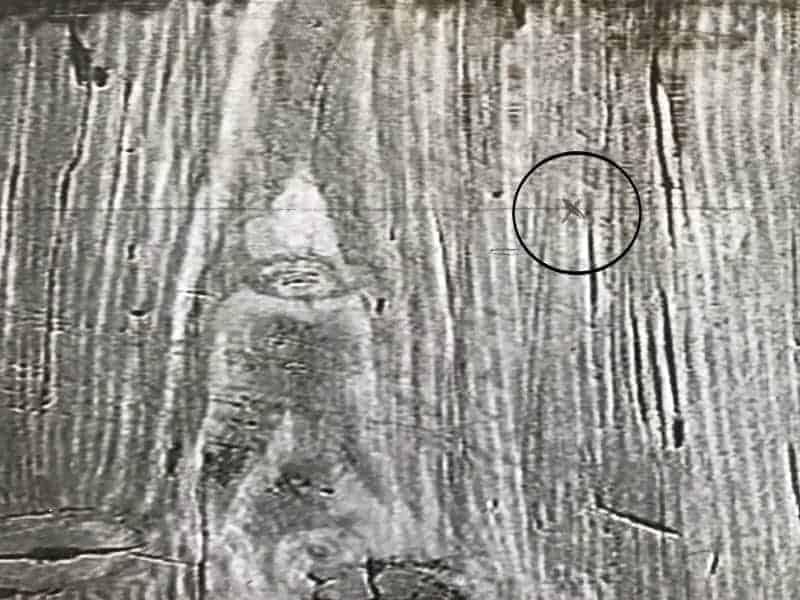
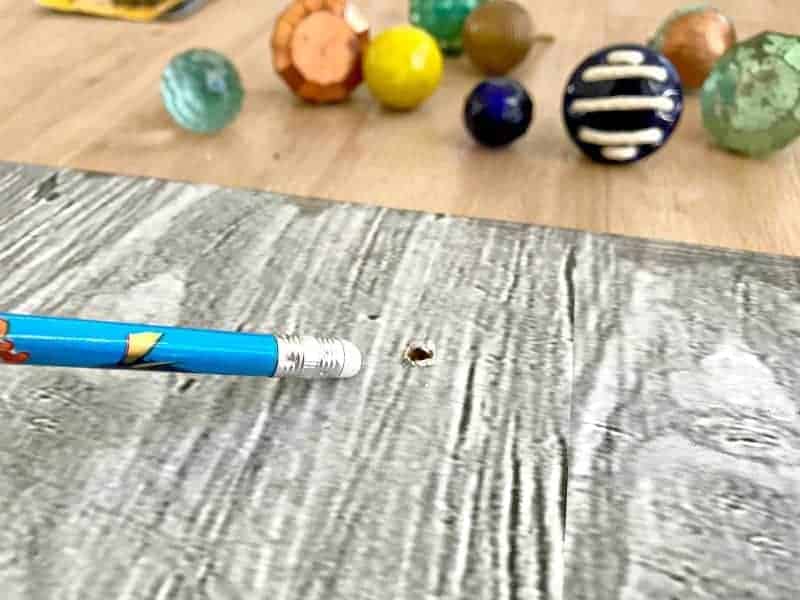
Step 2: Mark the holes
Using an erasable pencil or chalk, mark out the holes at the distances you measured previously.
Don’t forget that if you are doing two rows you need to stagger them so that one is high, the next is low, and so on.
*Make sure you like how the holes are arranged before you start buying knobs and drilling holes! You can always remeasure and move marks, but once you drill that hole is there!
Step 3: Assemble your supplies
To make a DIY necklace holder you will need:
- A drill
- Drill bits
- *Knobs
- Wood holder
You can find your knobs at a variety of locations. Some of my favorite places to look are Michael’s (wait for a 50% off sale), World Market, and eBay.

Step 4: Plan your layout
Now that you have your holes marked and your knobs assembled, it’s time to plan the layout.
Take your knobs and lay them out on the floor. Look at the colors and patterns if you have different styles and arrange them in a way that appeals to you.
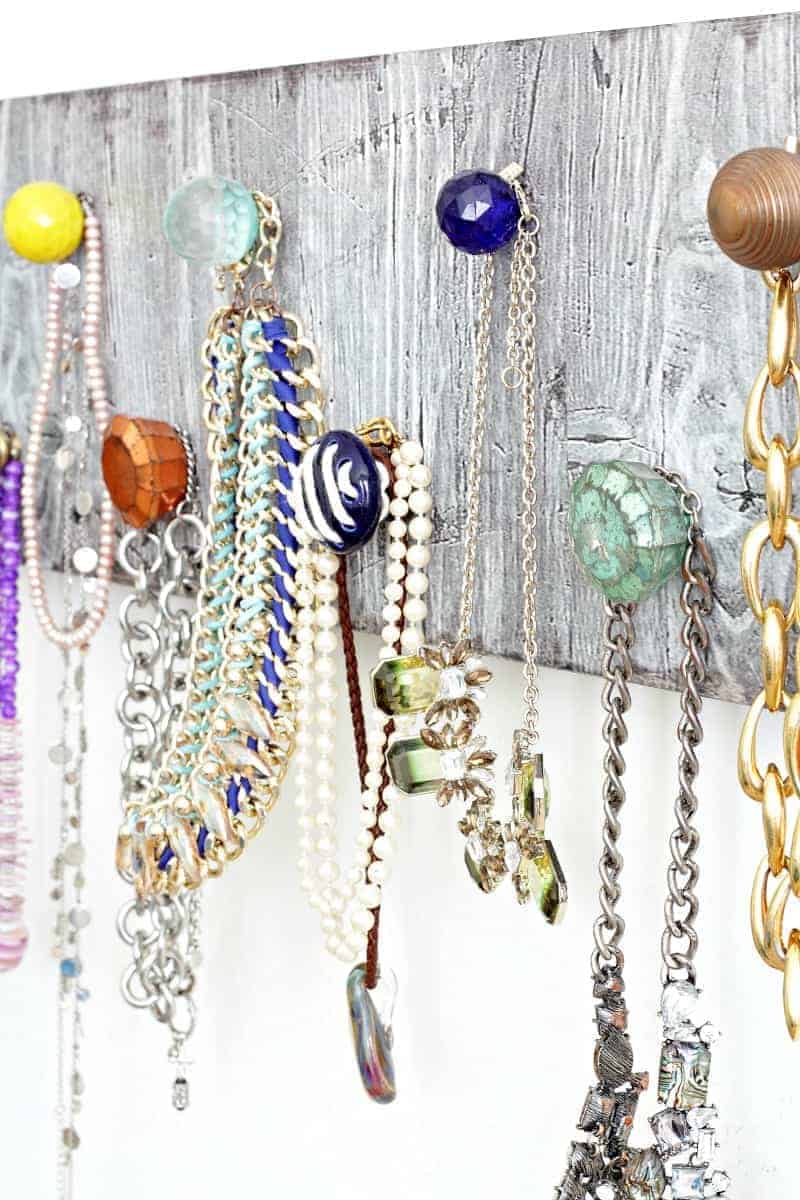
I ended up with five smaller knobs on the top and four large ones on the bottom, mixing colors with blues, oranges, yellows, and even one with one rope running through it!
Step 5: Drill the holes
It’s time to drill the holes.
Try and see if you can approximately measure the size of the knob screws and see what drill bit you will need to match the sizing.
If you aren’t able to tell how large they are, start with the smallest drill bit; you can always size up the hole!
For my knobs, I used the 3/16 drill bit.
Step 6: Screw in your knobs
Once you have all your holes in place you can now screw in your knobs. If the fit is loose or you have a hollow sign like mine, you can use the backing that comes with the knobs to hold them into place.
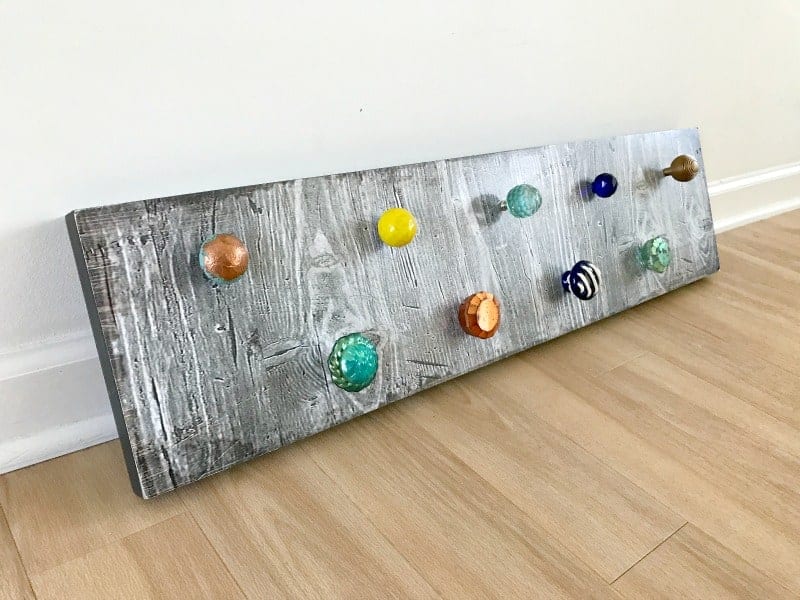
Step 7: Mount on the wall
My sign already came with hanging brackets, but if yours doesn’t have them already installed you can use some like these to hang your DIY necklace holder upon the wall.
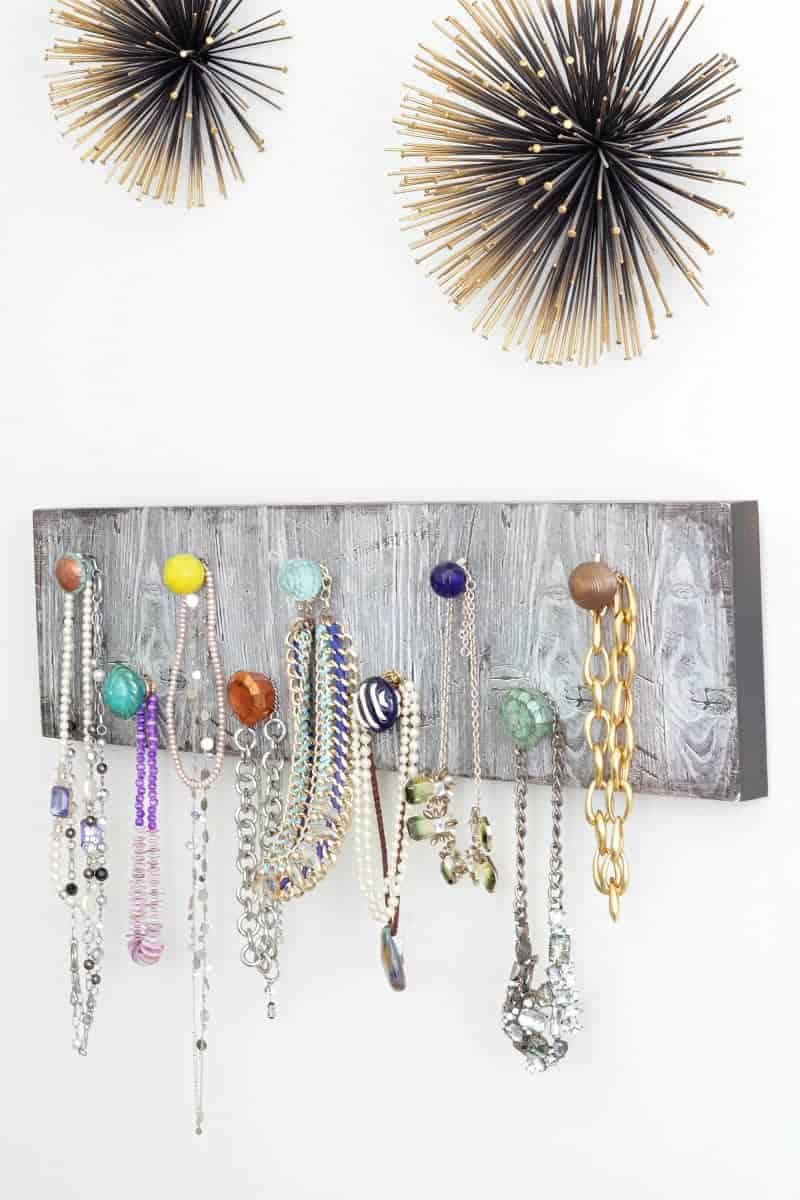
The final step is to hang up all your beautiful necklaces and stand back to admire your work!
Be proud of yourself, you’ve killed two birds with one stone. Your necklaces are now organized and you have a stunning statement wall necklace holder that doubles as decor! (This necklace holder already made an appearance previously in my pajama storage hack.)
Questions or comments?
I live for your feedback! If you have any questions or comments, drop them in the comment section below. 🙂
Pin this!
Perfect project to keep necklaces from tangeling in my drawer. love the door knobs so pretty.
Right? The blue ones are my favorites. <3
This turned out so cute, Marissa! All of the different color knobs you used really make it unique!
p.s. still loving your blogging reports – your info and honest is so appreciated 🙂 Keep up the good work!
Thanks so much, Tiffany! I really appreciate your comments, both for the necklace holder and for my reports. 🙂 I am cutting back on them since I niched down, but still will be pushing them out here or there. Cheers!
It was so nice. I love that DIY Necklace. I can’t wait to give it a try. Thanks for sharing.