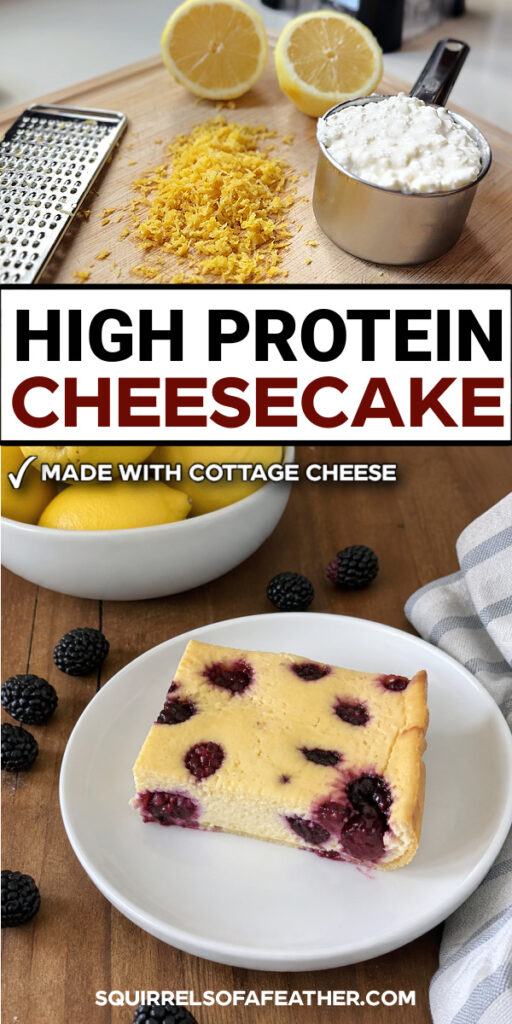
If you’ve ever wished dessert could actually help you hit your protein goals…this protein cheesecake is about to become your new obsession.
This is hands-down the best protein cheesecake I’ve ever made—and trust me, I’ve tested a LOT of versions. It’s creamy, slightly tangy, perfectly sweet, and packed with real, wholesome ingredients like cottage cheese, Greek yogurt, and fresh fruit.
Whether you’re looking for a high protein cheesecake to support your fitness goals, or just want a healthier dessert that actually tastes amazing, this recipe checks all the boxes.
And the best part?
It’s ridiculously simple.
No complicated steps. No fancy ingredients. Just a smooth, creamy protein cheesecake recipe you can throw together fast.
Protein Cheesecake Ingredients
Here’s everything you’ll need to make this easy protein cheesecake recipe:
- 1 cup 2% cottage cheese
- 1 cup Greek yogurt (I use Fage brand)
- 2 eggs
- ¼ cup maple syrup
- 3 tbsp tapioca starch
- 1 tsp vanilla extract
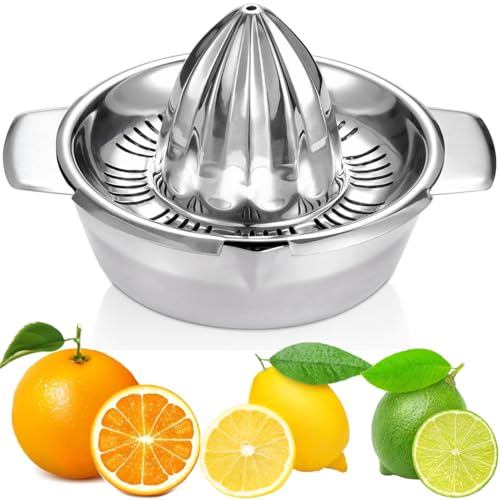
- Juice of ½ large lemon
- Zest of 1 lemon
- 1 cup of berries

How to Make High-Protein Cheesecake
If you’ve been wondering how to make protein cheesecake, you’re going to love how simple and straightforward this process is. This is truly an easy protein cheesecake recipe that doesn’t require any complicated techniques or baking experience.
(I’m a huge fan of easy desserts, as I’m sure you’ve noticed from my Jello Jigglers recipe and rice cooker upside down cake!)
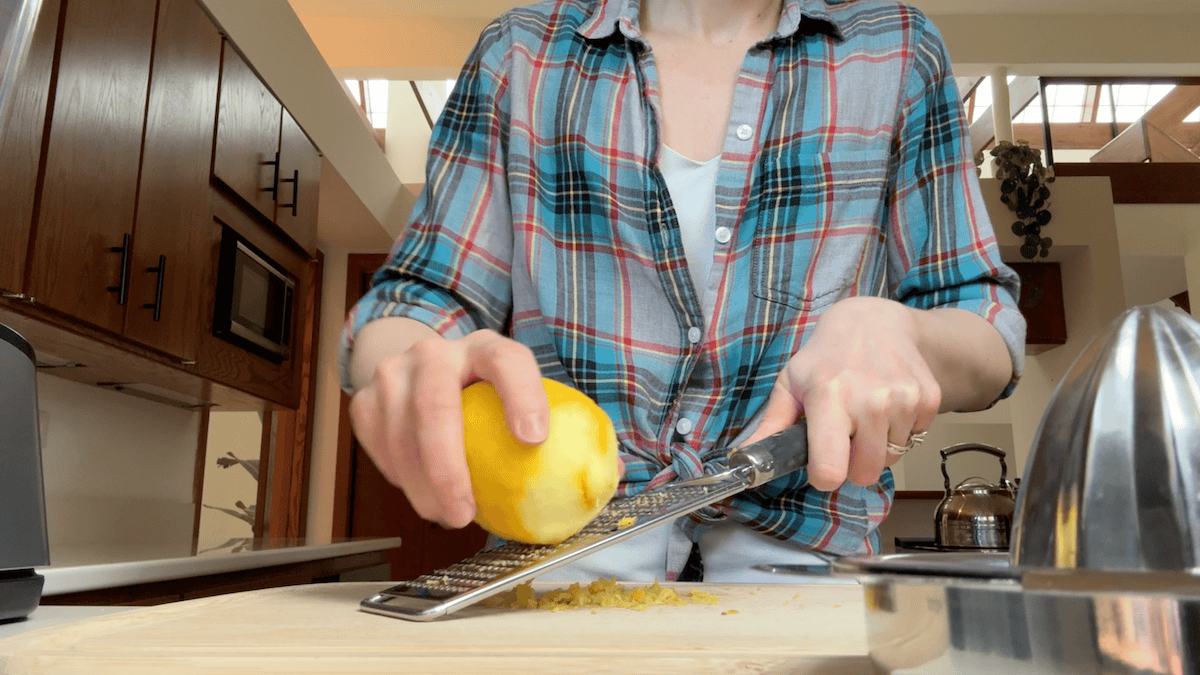
Start by preheating your oven to 350°F so it’s ready to go once your batter is mixed. While the oven heats, prepare your lemon by zesting the outer peel first (this adds a bright, fresh flavor that really elevates the cheesecake), then cut and juice it. If your lemon is large, you’ll only need half—but if it’s smaller, go ahead and use the whole thing.
Next, add all of your ingredients—cottage cheese, Greek yogurt, eggs, maple syrup, tapioca starch, vanilla extract, lemon juice, and lemon zest—into a blender. Blend everything until the mixture is completely smooth and creamy. This step is key for achieving that classic cheesecake texture, especially when making a protein cheesecake with cottage cheese, since blending removes any lumps and creates a silky consistency.
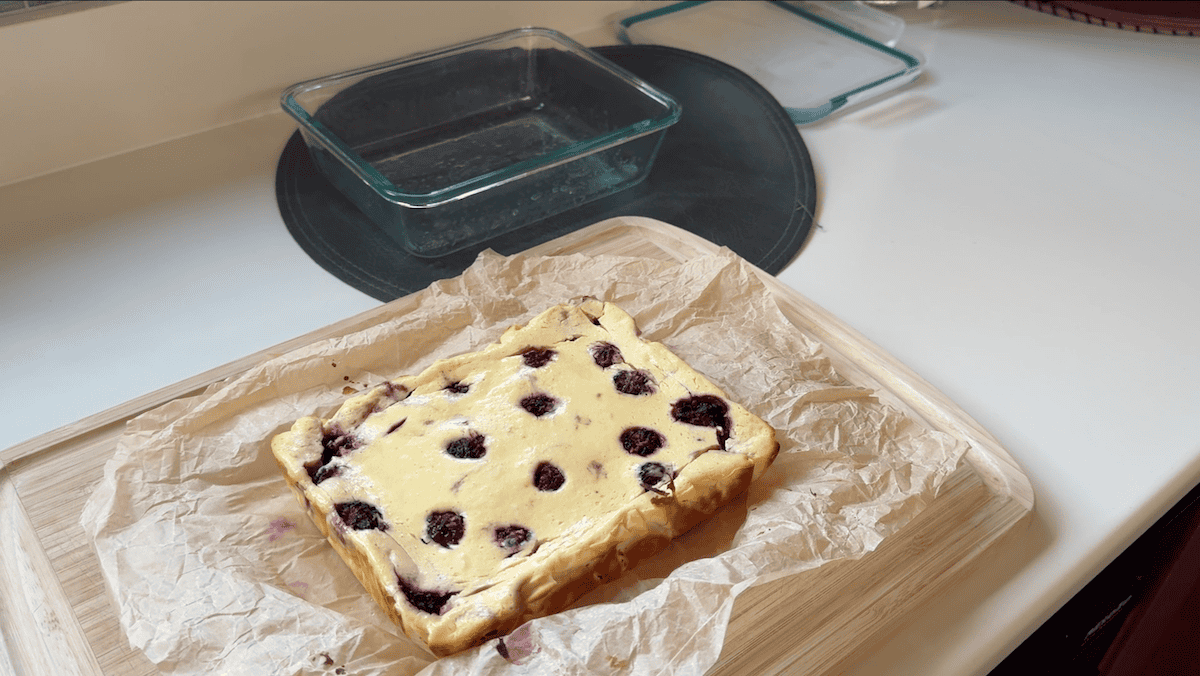
Once your batter is ready, line your baking dish with parchment paper. A helpful trick is to crinkle the parchment paper first before pressing it into the dish—this makes it much easier to work with and helps it stay in place.
After that, pour the cheesecake batter into the lined dish, then use a silicone spatula to scrape out every last bit from the blender and smooth the top.
Place the dish into the oven and bake for 45–60 minutes. The exact baking time will depend on your oven and the size of your dish, so keep an eye on it toward the end. You’ll know your high protein cheesecake is done when the center is set and a toothpick inserted into the middle comes out clean.
After baking, let the cheesecake cool on the countertop before transferring it to the refrigerator. This part requires a little patience, but it’s worth it—chilling the cheesecake for at least 4–6 hours (or overnight) allows it to fully set and develop that rich, creamy texture you expect from the best cheesecake recipes.
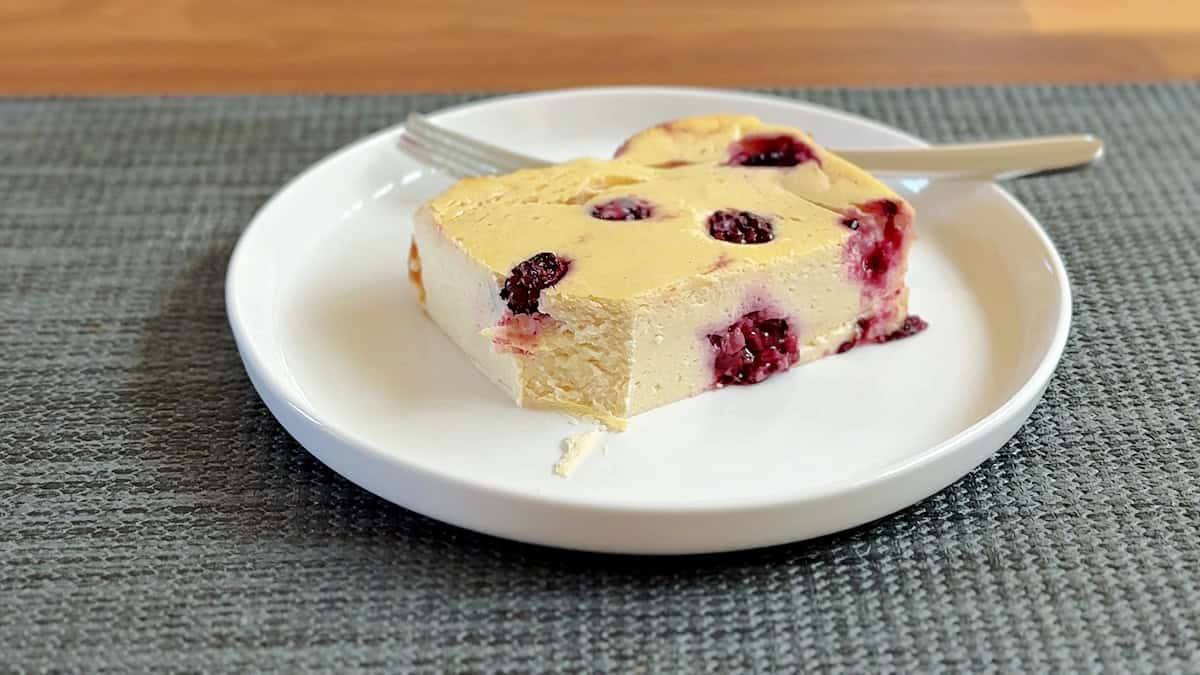
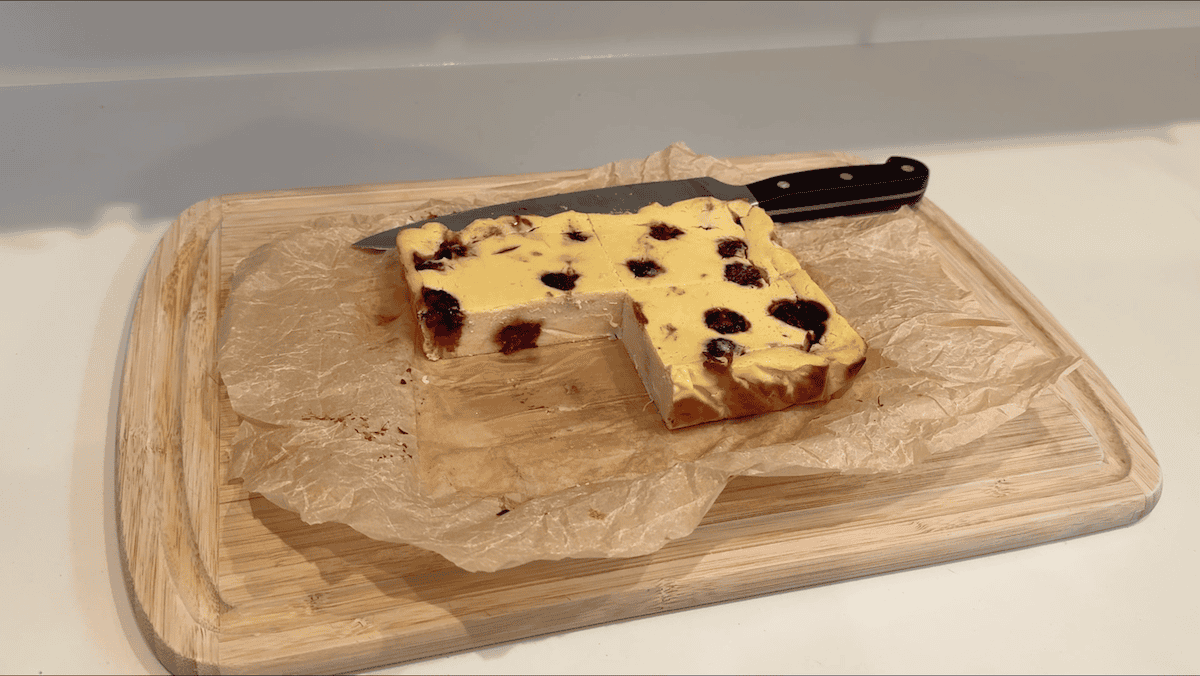
Once chilled, slice into four servings (or 6, if you’re not as gluttonous as our family is), add your favorite berries if desired, and enjoy a delicious, satisfying protein cheesecake with Greek yogurt that feels indulgent—but is actually working with your goals.
This guilt-free protein cheesecake is so good, it’s one of family’s favorite breakfast recipes!
More breakfast recipe ideas:
- Healthy Butternut Squash and Kale Muffins
- How to Make Japanese Rice Cooker Pancakes
- Best Homemade Fluffy Waffle Recipe
Tools to Make This Recipe
Here is the exact list of tools and appliances I used to make this protein cheesecake recipe.
- Cutting board
- Blender (this is the Ninja blender I own)
- Grater or zester
- Citrus juicer or press
- Measuring cups and spoons
- Parchment paper (I use this eco-friendly brand)
- 9×7 baking dish (this is the dish I use, without the lid, of course)
- Silicone scraping spatula
Ingredient Substitutions
One of the reasons this is the best protein cheesecake is how flexible it is. Here are a few tips and idea to get the best and tastiest results with this recipe.
Berries
You can use any berries you like—or skip them entirely for a refreshing lemon cheesecake. The berries you see in the photos are blackberries, but blueberries, strawberries, and raspberries all work beautifully with this recipe and compliment the lemon flavor nicely.
If your berries are on the larger side, chop them into smaller pieces. (I chop blackberries and strawberries, but use whole blueberries, for example.)
Frozen berries are great for convenience, and sometimes I freeze small batches of berries to use later. Just note you may need to slightly increase baking time when using frozen berries.
Cottage Cheese
This recipe works with full-fat, low-fat, or 0% cottage cheese depending on your goals. If tracking your protein or calories, you will need to adjust your calculations accordingly.
What kind of starch to use?
No tapioca starch on hand? No problem. You can substitute cornstarch instead.
I personally prefer the flavor and texture of tapioca starch vs. constarch, but both taste great!
Baking Tips for Perfect Protein Cheesecake
1. Crinkle Your Parchment Paper
Crumple the parchment paper before placing it into your baking dish. This makes it much easier to press into the corners and helps it stay in place.
It also makes removing your protein cheesecake and cleanup much easier.
2. Use the Right Baking Dish
I use a 6-cup glass container from my Snapware set, but any small, oven-safe baking dish will work. Glass containers from IKEA are also a great option—just make sure they are oven safe before using.
3. Adjust for Smaller Dishes or Ramekins
If you don’t have a large enough dish, you can use smaller containers or ramekins instead. Just be sure to adjust the baking time and check for doneness earlier.
Your high-protein cheesecake is ready when a toothpick inserted into the center comes out clean.
4. Don’t Skip the Chill Time
This step is essential for achieving that classic cheesecake texture.
Let your cheesecake cool on the counter first, then refrigerate for at least 4–6 hours (or overnight if possible). This allows it to fully set and become rich, creamy, and sliceable.
Final Thoughts
If you’re looking for a high protein cheesecake that actually tastes indulgent while still supporting your goals…
This is it.
It’s simple, customizable, and made with real ingredients you probably already have at home.
And once you make it once?
You’ll realize just how easy it is to turn everyday ingredients into something that feels like a treat—but works for you, not against you.
Pin This Protein Cheesecake Recipe on Pinterest

Best Protein Cheesecake Recipe (with Cottage Cheese)
Looking for the best protein cheesecake recipe? This high protein cheesecake with cottage cheese and Greek yogurt is smooth, creamy, and easy to make. Perfect healthy dessert idea for weight loss, meal prep, or satisfying sweet cravings. Learn how to make protein cheesecake at home!
Ingredients
- 1 cup 2% cottage cheese
- 1 cup Greek yogurt (I use Fage)
- 2 eggs
- ¼ cup maple syrup
- 3 tbsp tapioca starch
- 1 tsp vanilla extract
- Juice of ½ large lemon
- Zest of one lemon
- 1 cup of berries (blackberries, strawberries, blueberries, or raspberries)
Instructions
- Preheat your oven to 350° F.
- Use a grater to zest the whole lemon and set aside.
- Juice 1/2 of the large lemon. (For small lemons, use juice from the entire lemon.)
- Add all the ingredients (EXCEPT for the berries) to a blender and blend until completely smooth.
- Line a 9x7 inch baking dish with parchment paper (crinkle into a ball and unfold to make it easier to put in the baking dish.)
- Pour the batter into the parchment paper lined baking dish; use a spatula to remove all the batter from the blender.
- Bake in the oven for 45-60 minutes. (Cheesecake is done when toothpick inserted into the center comes out clean.)
- Remove from oven and allow to fully cool on countertop, then refrigerate at least 4-6 hours or overnight, if possible.
- Serve chilled plain or with your topping of choice!
Recommended Products
As an Amazon Associate and member of other affiliate programs, I earn from qualifying purchases.
-
 Ninja BN801 Professional Plus Kitchen System, 1400 WP, 5 Functions for Smoothies, Chopping, Dough & More with Auto IQ, 72-oz.* Blender Pitcher, 64-oz. Processor Bowl, (2) 24-oz. To-Go Cups, Grey
 -
If You Care Parchment Baking Paper 70 Sq Ft Roll, Unbleached, Chlorine Free, Greaseproof, Silicone Coated, Standard Size, Fits 13 Inch Pans (Pack of 2)
-
Citrus Lemon Orange Grapefruit Juicer Manual Squeezer 304 Stainless Steel Robust Hand Juicer Reamer Rotation Press with Strainer&10oz Bowl, 2 Pour Spouts, Dishwasher Safe, Easy to Clean, Heavy Duty


Leave a Reply