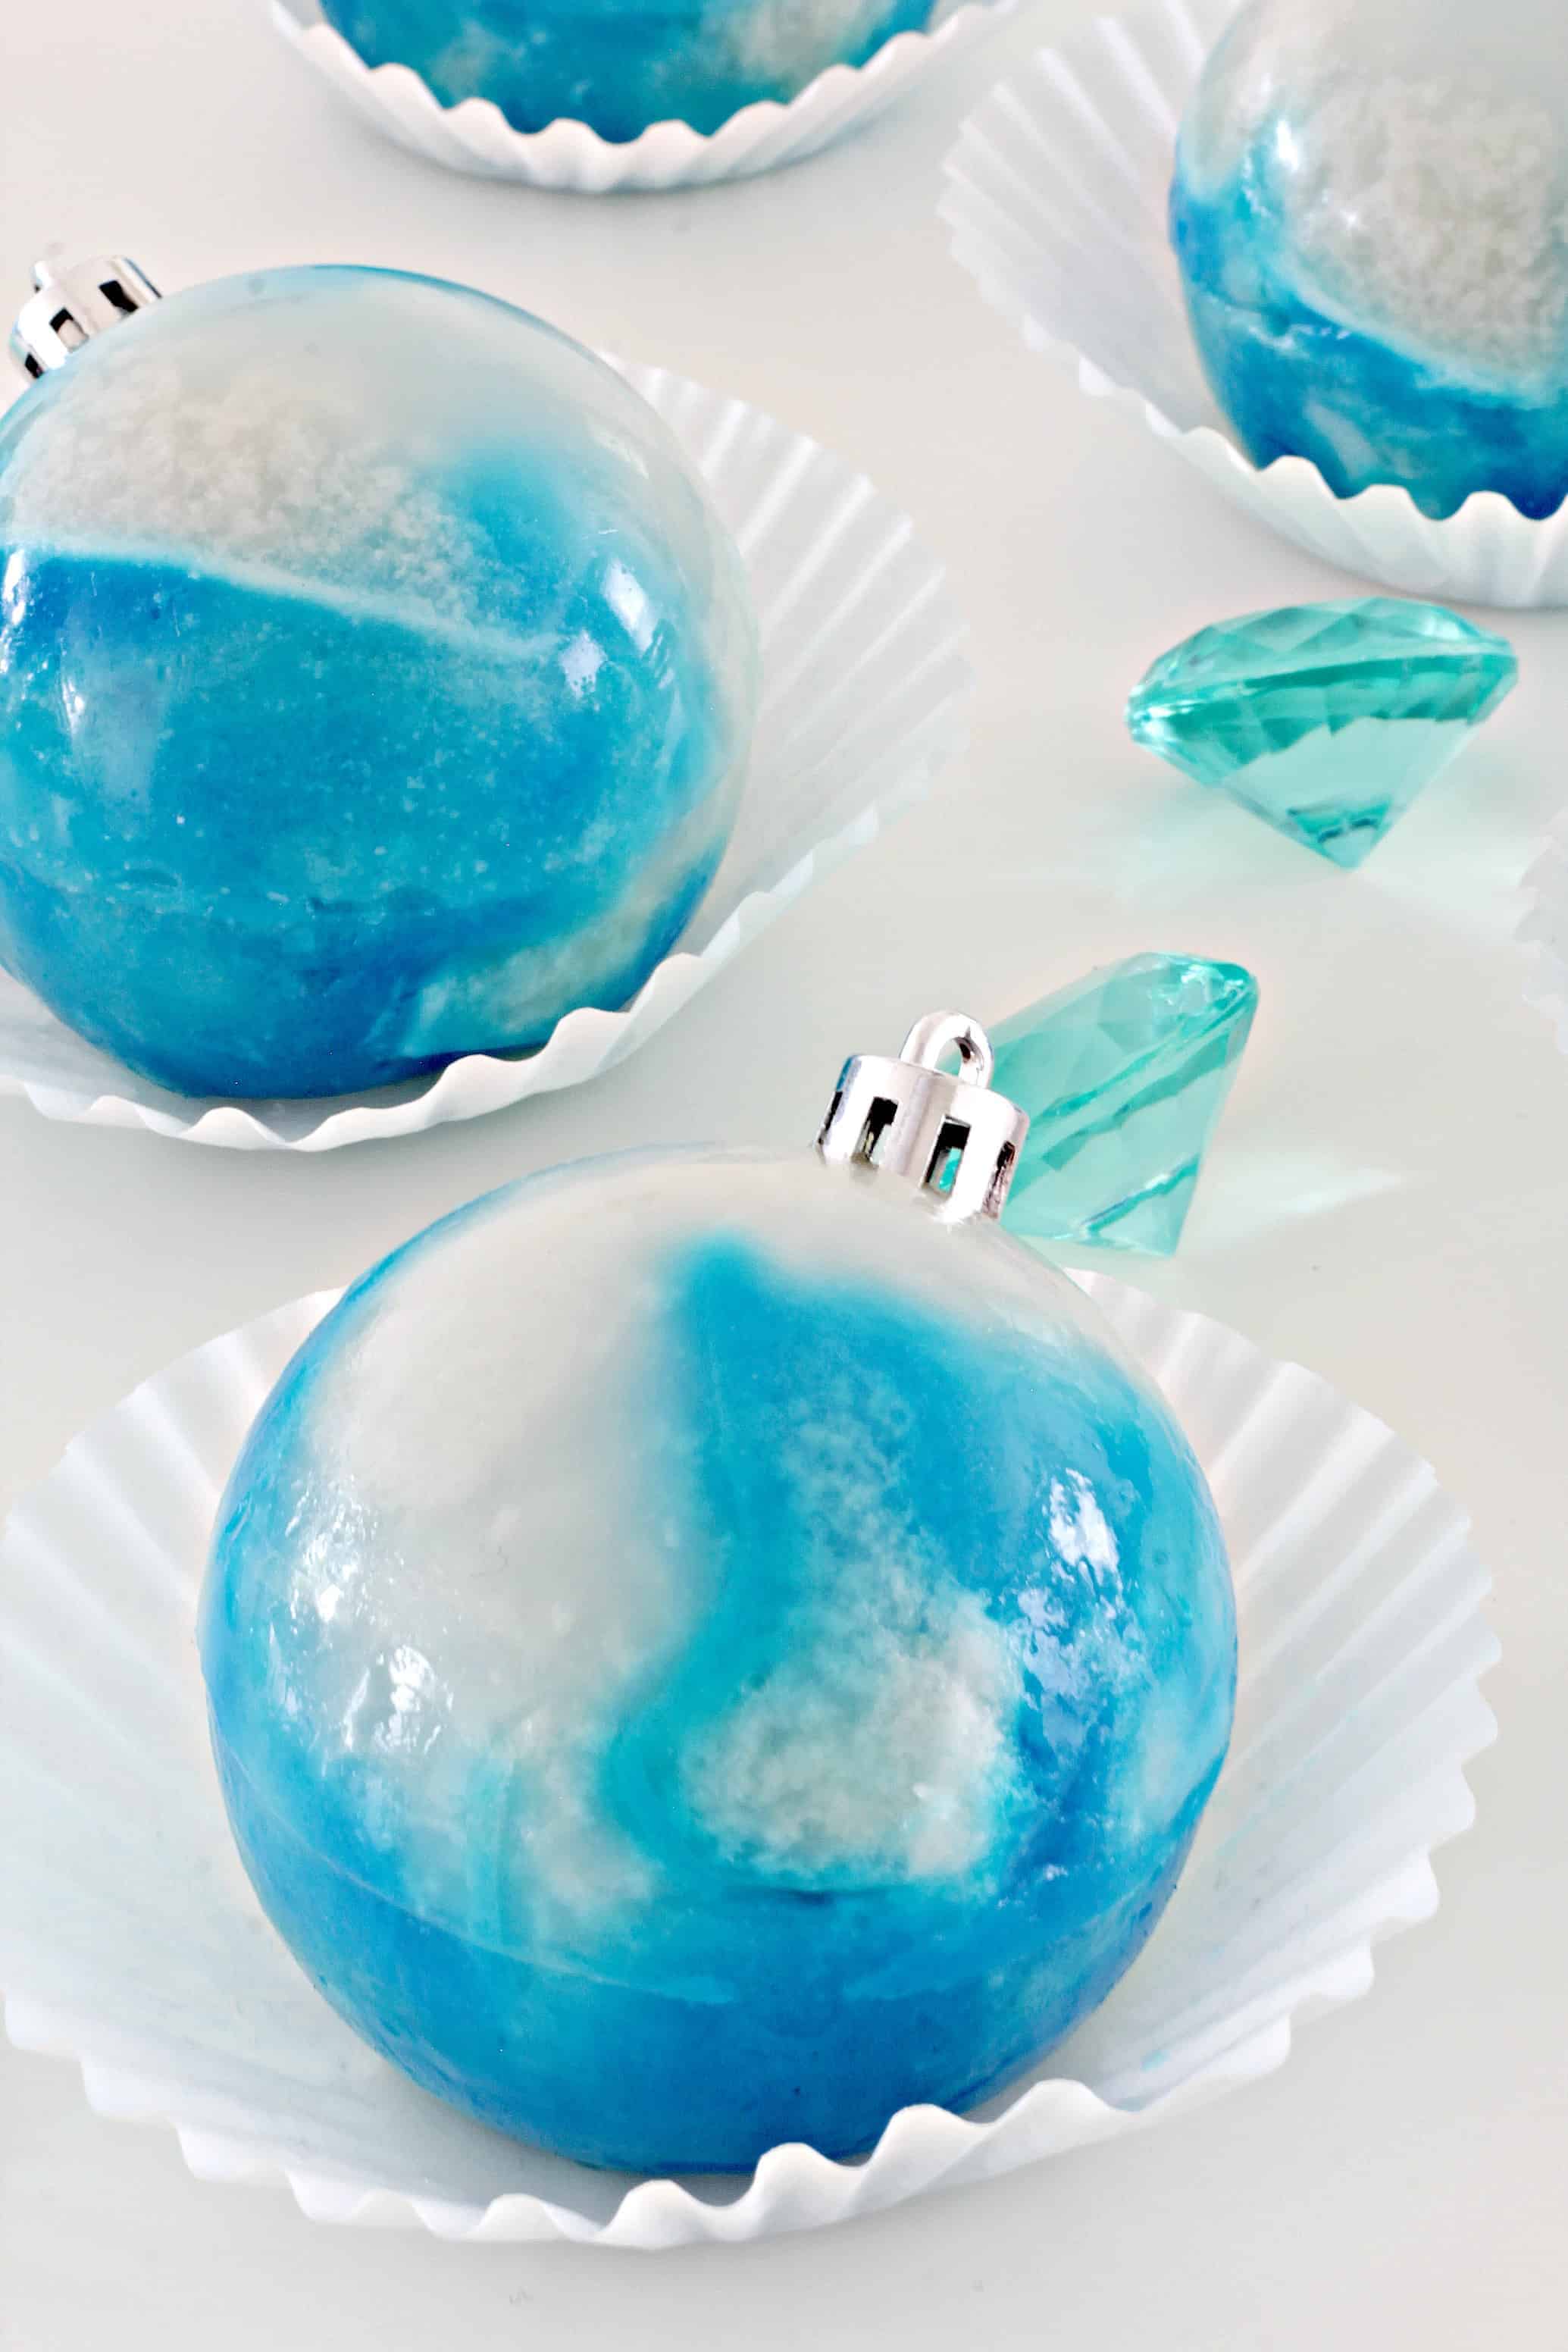
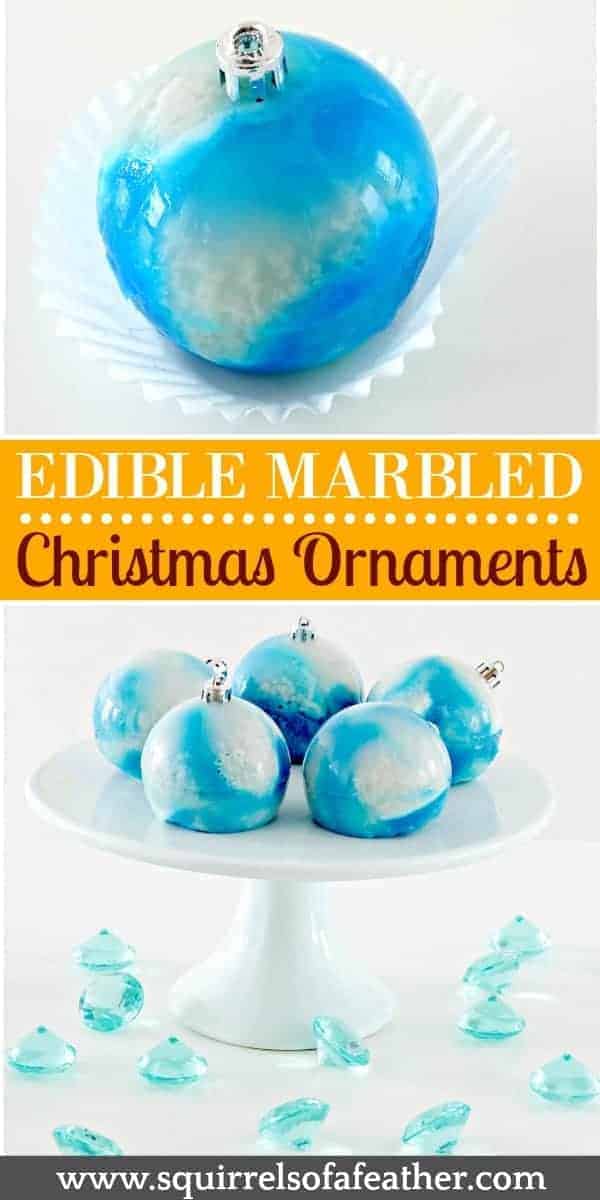
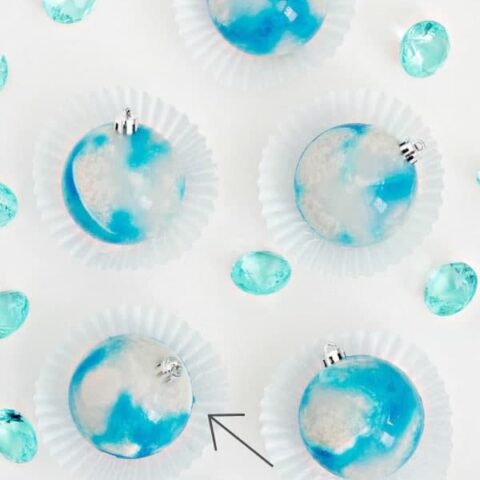
Looking for a unique Christmas dessert that will elicit gasps of awe from your party guests? These edible ornaments look just like real marbled ornaments with their stunning swirled effect. Get this easy edible ornament recipe and make your own marbled Christmas ornament jellies, today!
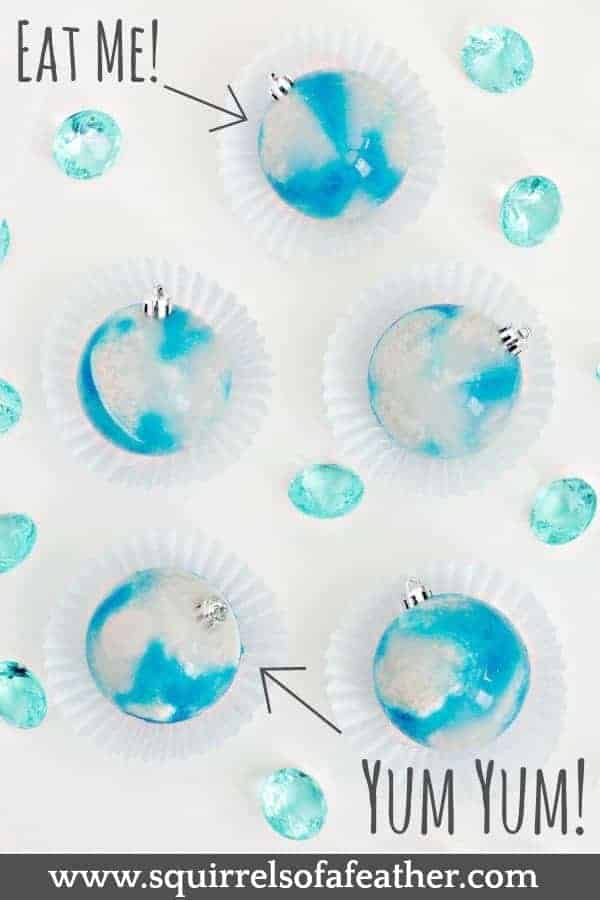
Edible ornaments that look just like real marbled Christmas ornaments
Ok, you caught me. I have to admit, I have never marbled anything IN MY LIFE until now.
I have seen gorgeous images of marbled everything…marbled cookies, marbled cakes, marbled nails, marbled icing, but I never took the plunge until I had the brainstorm to make these edible ornaments with a marbled effect.
When I shared my Halloween edible giant cow eyeball recipe I was already dreaming of other ways to adapt that recipe for Christmas.
Thus, this marbled edible ornament recipe was born!
I think I may be addicted. These marbled edible Christmas ornaments just may be the gateway drug to a marbling obsession…
This post may contain affiliate links for your convenience. That means that if you make a purchase, I will receive a small commission at no extra cost to you. Read more here.
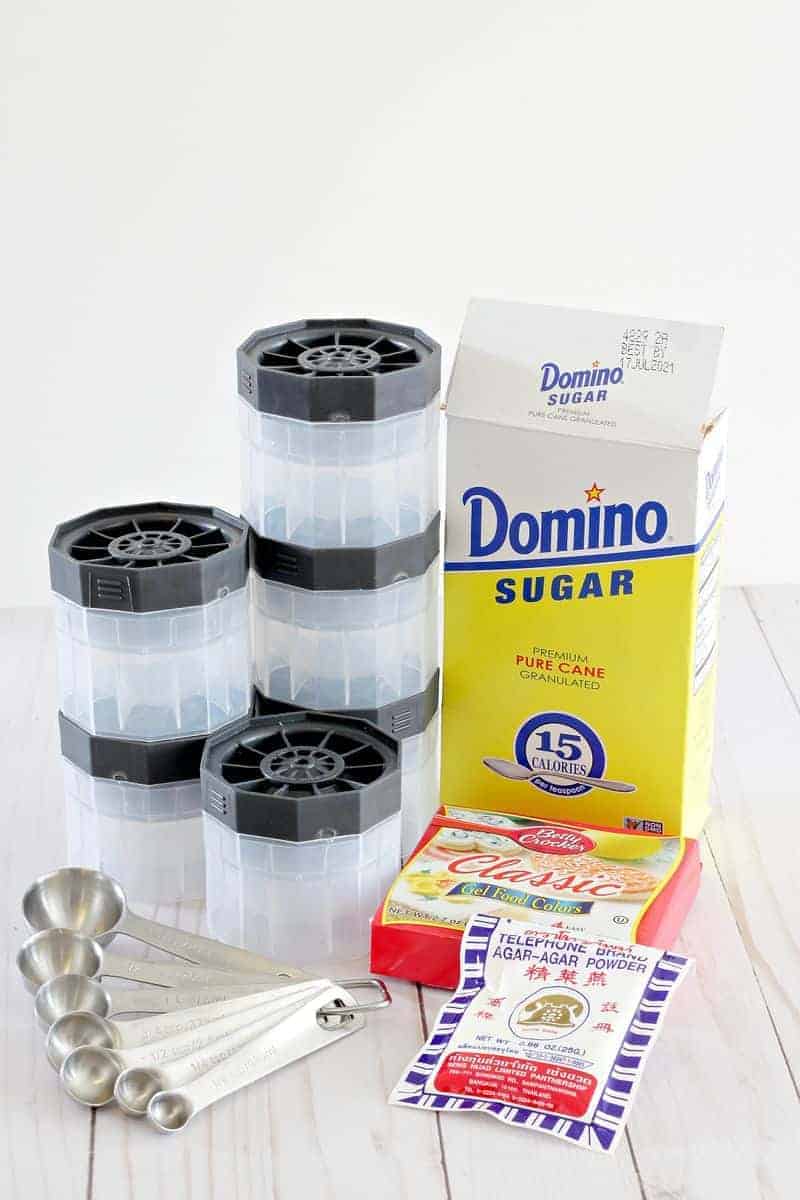
What you need to make these edible ornaments
Here is everything you need for your edible ornaments:
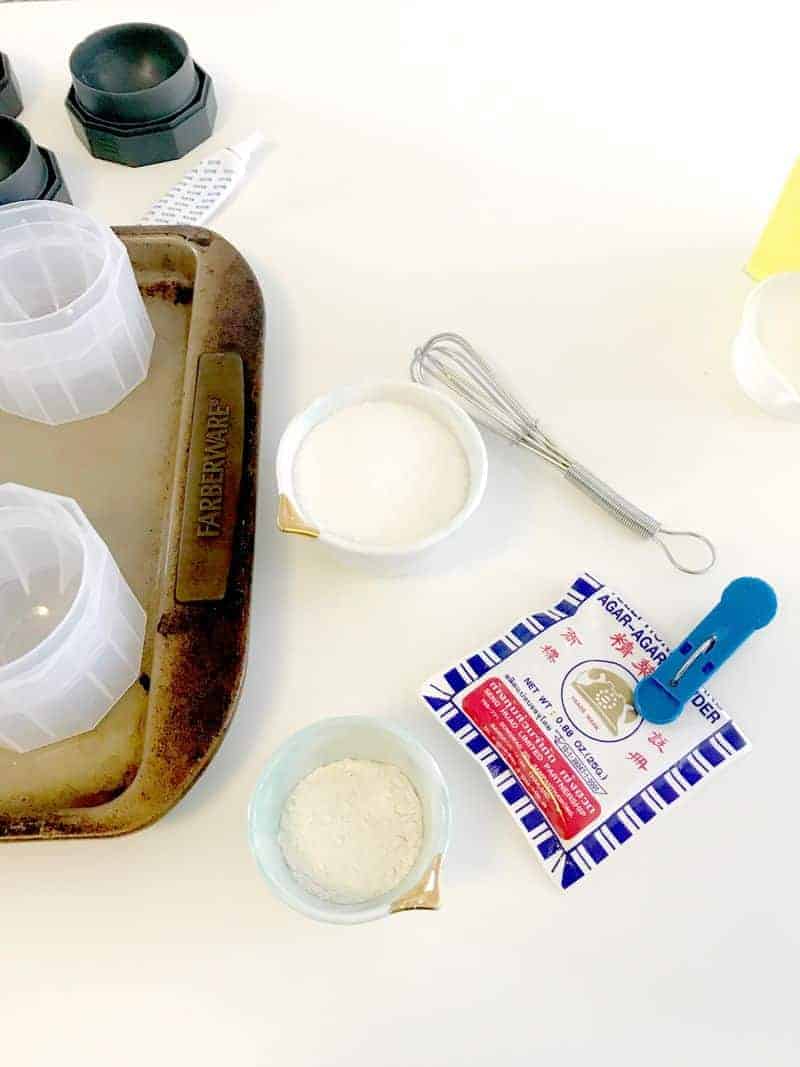
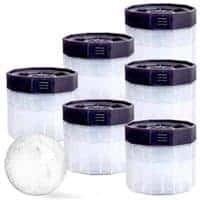
- Pack of six 2.5 inch spherical molds
- Telephone brand agar agar
- Gel food coloring in chosen color (I used blue)
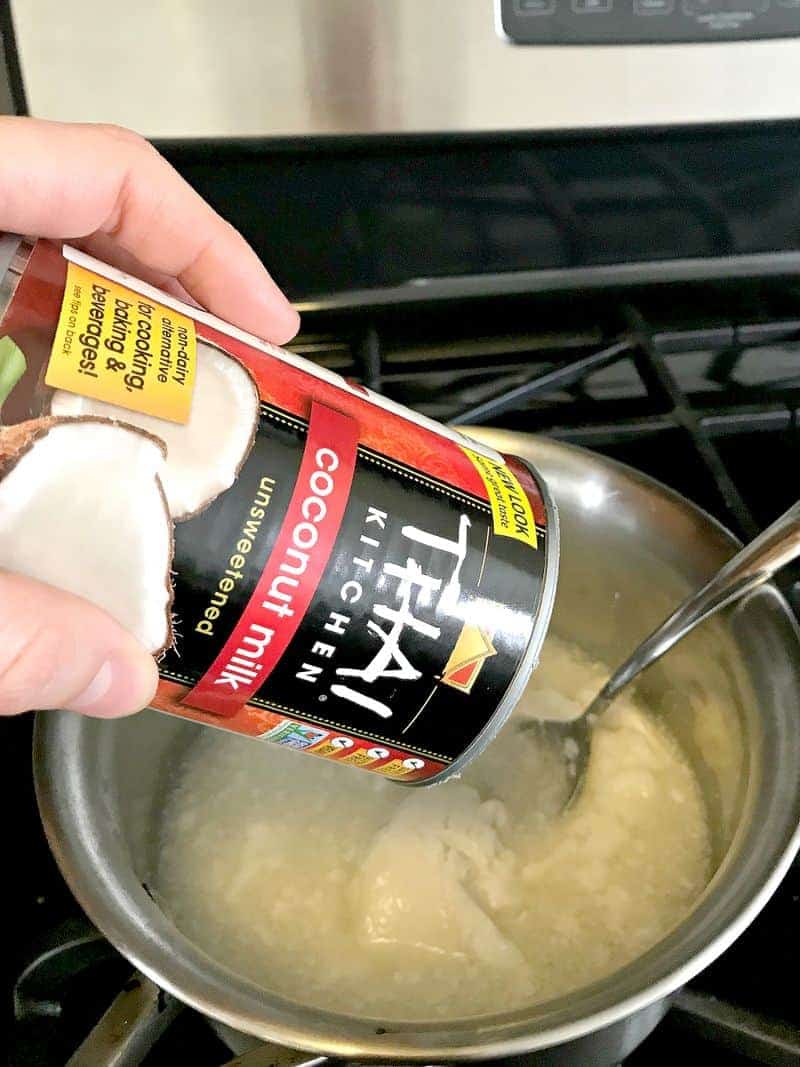
- 2 cans of coconut milk, unsweetened (I prefer A Taste of Thai brand)
- White sugar
- Water
- A cookie sheet
These edible Christmas ornaments taste like a sweet and bouncy coconut pudding! They are much stiffer than Jell-O, to give you an idea of your texture.
(If you don’t like coconut, you can also substitute almond milk, but you will need to play with the sugar ratios and taste test while you are heating everything up.)
What is agar agar?
Agar agar is basically the plant-based equivalent of gelatin. It is made from seaweed, so it is okay for vegans and vegetarians to consume; it is also gluten-free!
Agar agar is colorless, odorless, and pretty bland on its own, so you need to use either flavored liquids and/or sugars to liven up the flavor! If you don’t, you’ll be sorry, trust me.
More agar agar will result in a stiffer jelly and that is what we want for these edible ornaments. The stiffness of the jelly will hold up well inside the special mold.
Related posts:
Where to buy agar agar
You can find agar agar in most local Asian food stores. Unfortunately, I have never seen it in the international aisle of supermarkets.
If you can’t find it locally it’s easy to purchase online. I HIGHLY recommend you purchase Telephone brand agar agar and avoid Gold Coin brand agar agar at all costs. The first ingredient in that brand is sugar, and it won’t yield the same results as this recipe.
Best spherical mold for edible ornaments
If you want to get nice, sphere-like ornaments, stick with the sphere mold brand I recommended. I have tried other spere molds like this one and was really disappointed when they didn’t work at all!
It seems that sphere molds that are filled individually work the best.
You simply fill your mold nearly to the top with the desired liquid, you then take the black cap and slowly press it down on top of the mold. The silicone sides will displace the liquid upwards, and air will vent out from the small hole in the top!
That’s great because it means you don’t have to try and awkwardly shove some liquid through a tiny hole to get the perfect spheres.
(Well, nearly perfect; I did notice a bit of a line where they two halves of the sphere mold met, but was still very pleased with the results.)
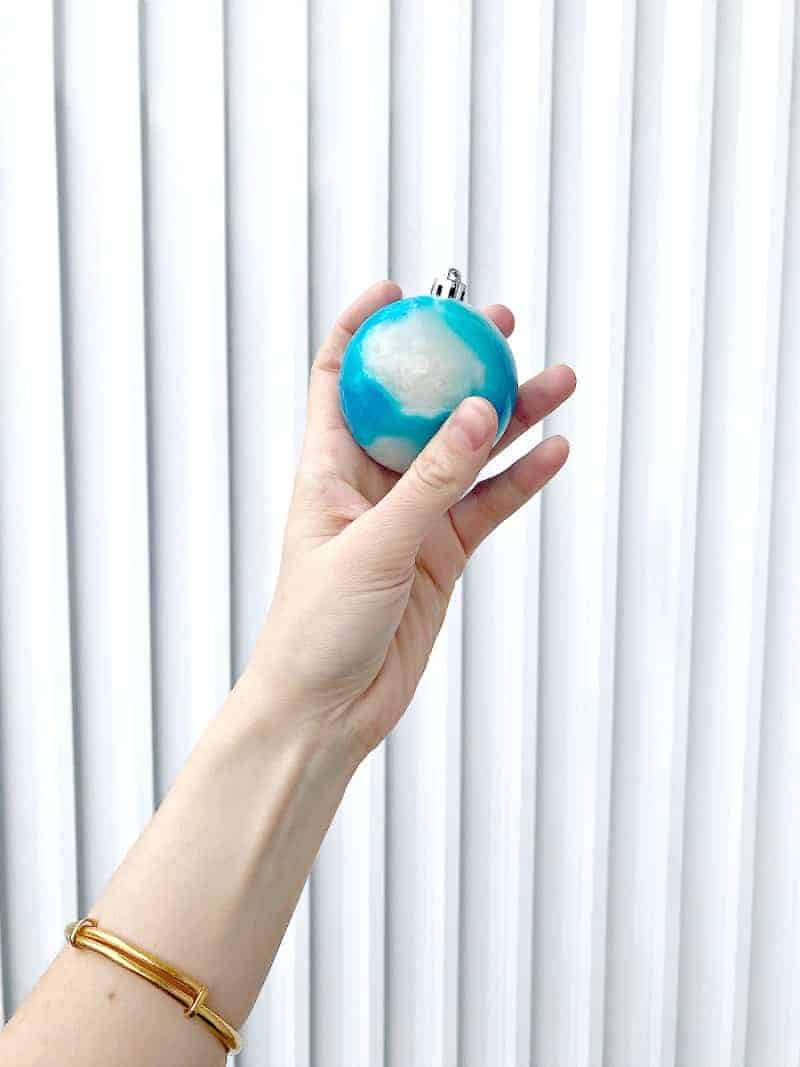
You could fill the mold entirely to the top and make a perfect ball, but I left a little space so that these marbled ornaments would have a small, flat bottom. That way when people go to eat it, it isn’t rolling around on their plate. 
(I think I actually left a little too much space, so I recommend that you fill the molds nearly to the top; you can trim down what you don’t like! Better too much than too little.)
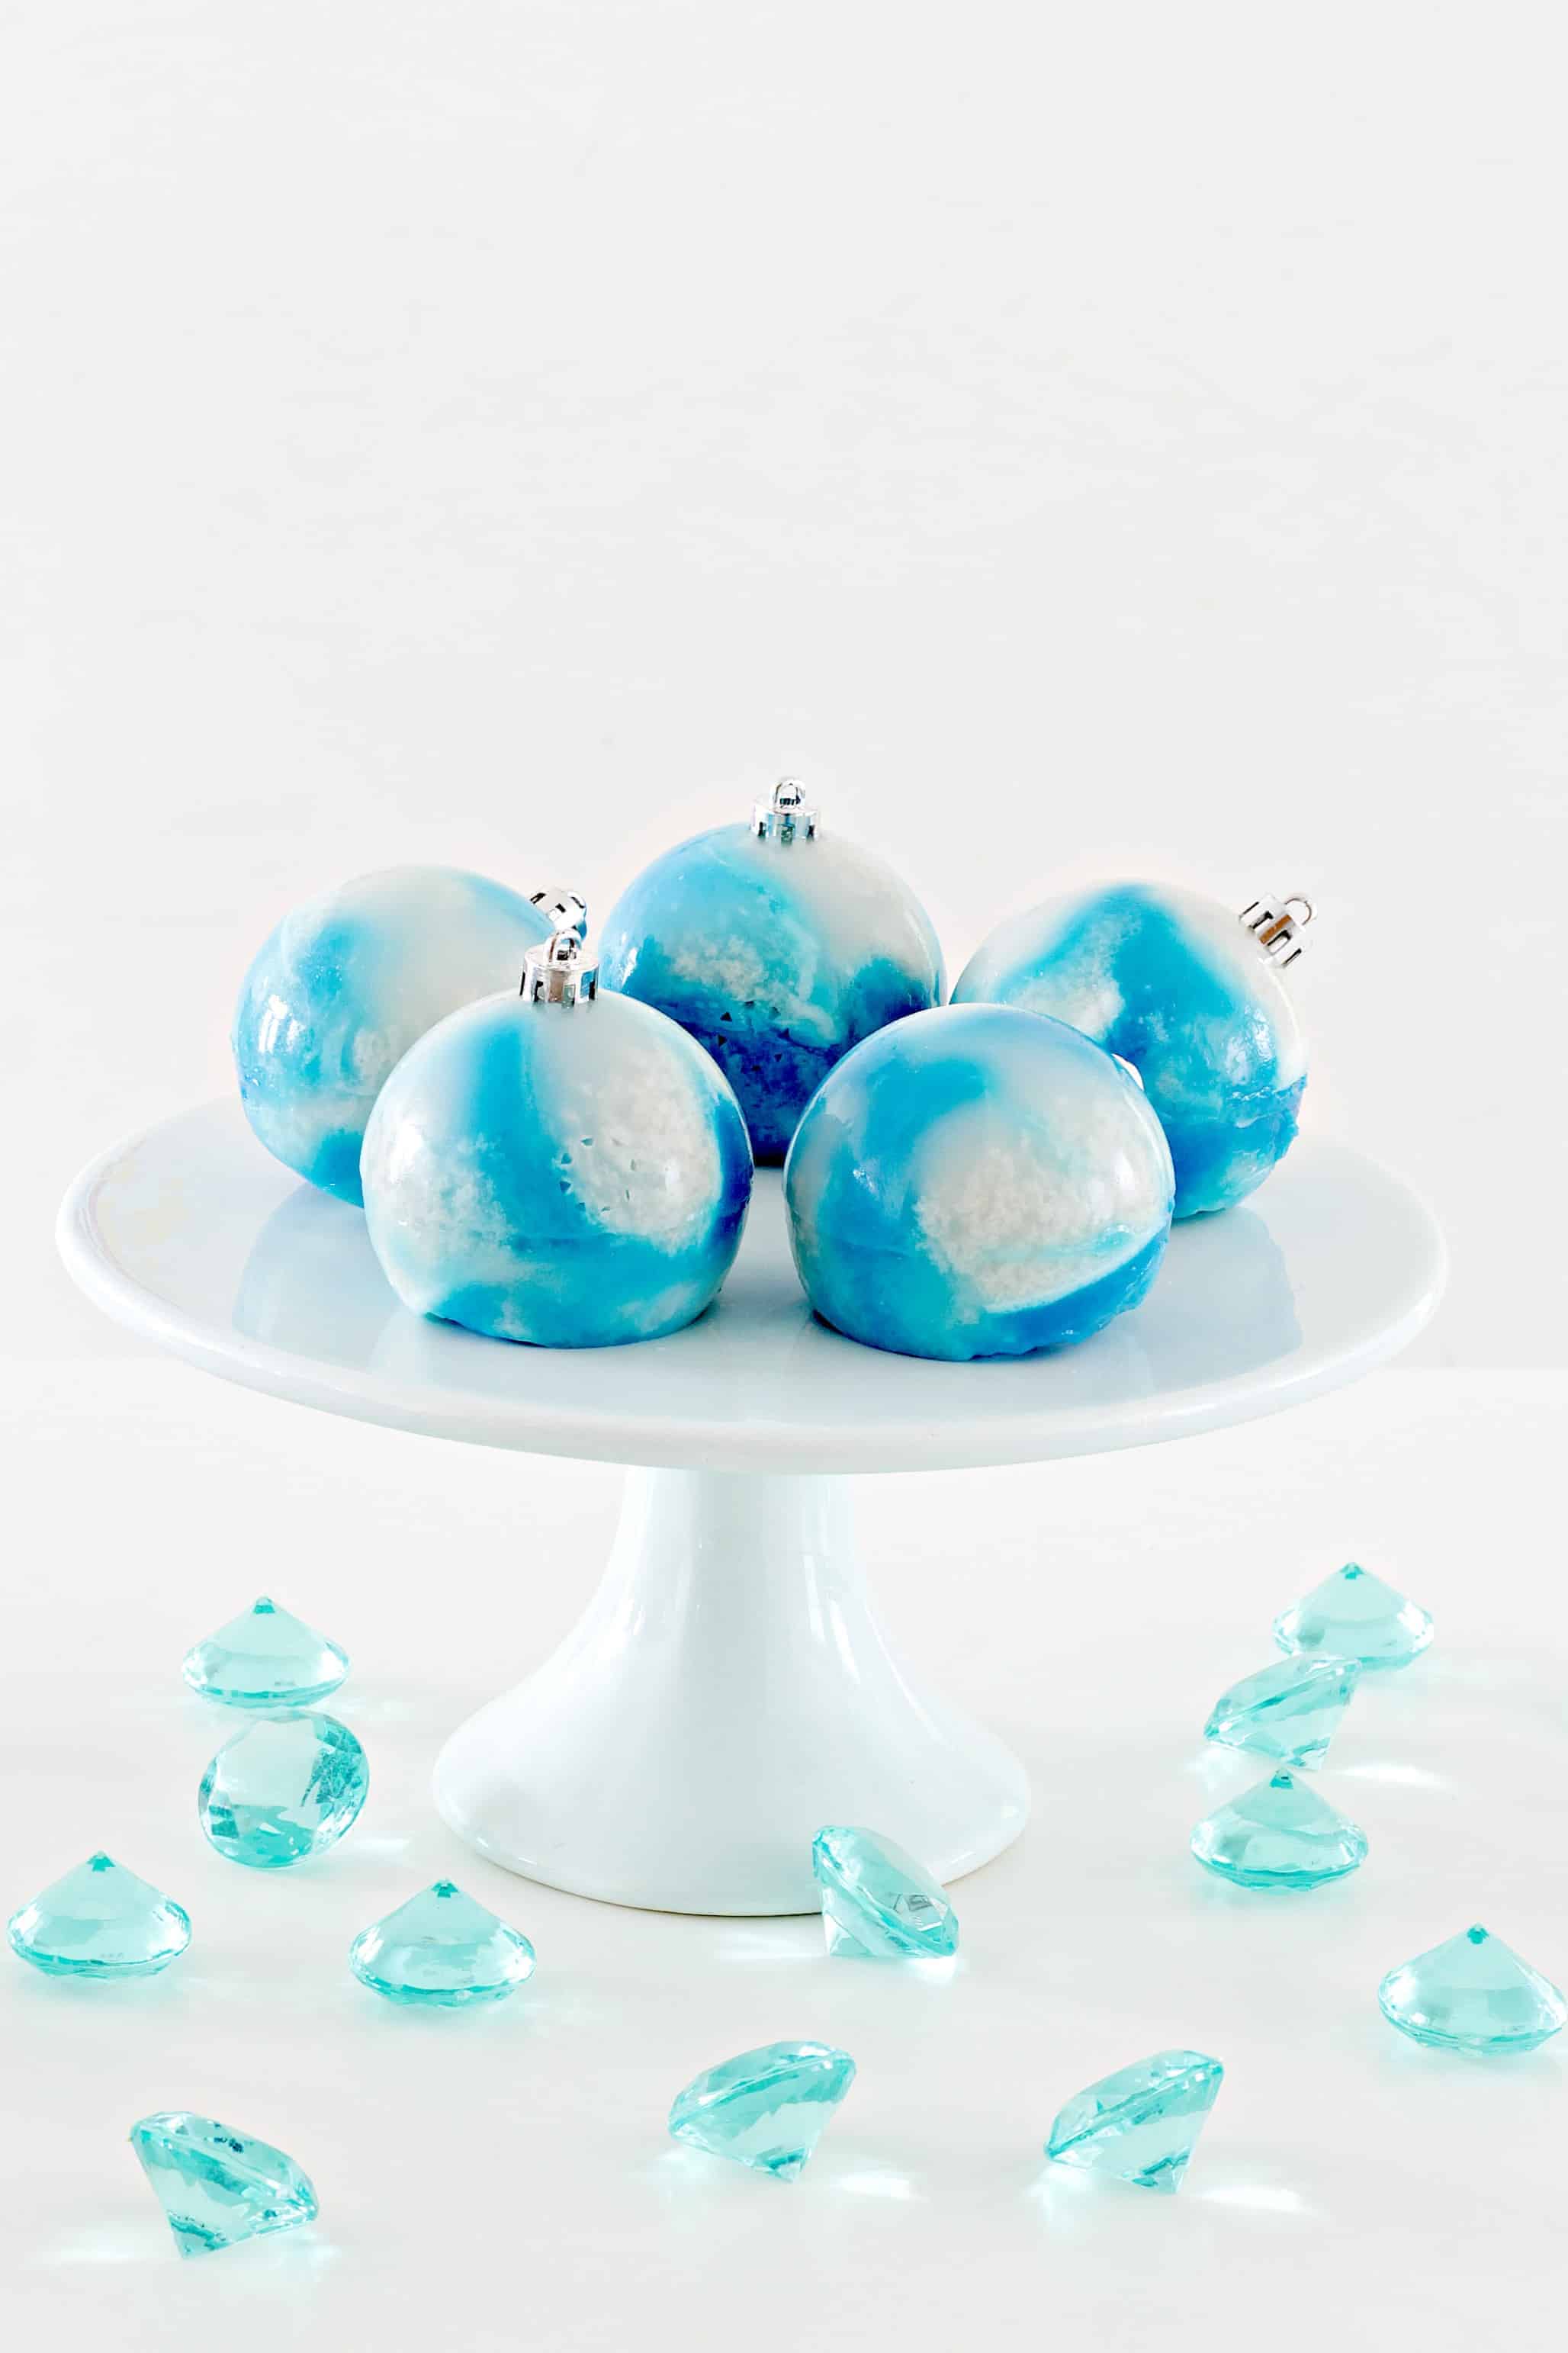
Flat bottom ornaments you make the Christmas tree go ’round.
How to make edible ornaments
This recipe is slightly different than my cow eyeball recipe, so if you are familiar with that pay attention because some of the steps and ingredients have been changed!
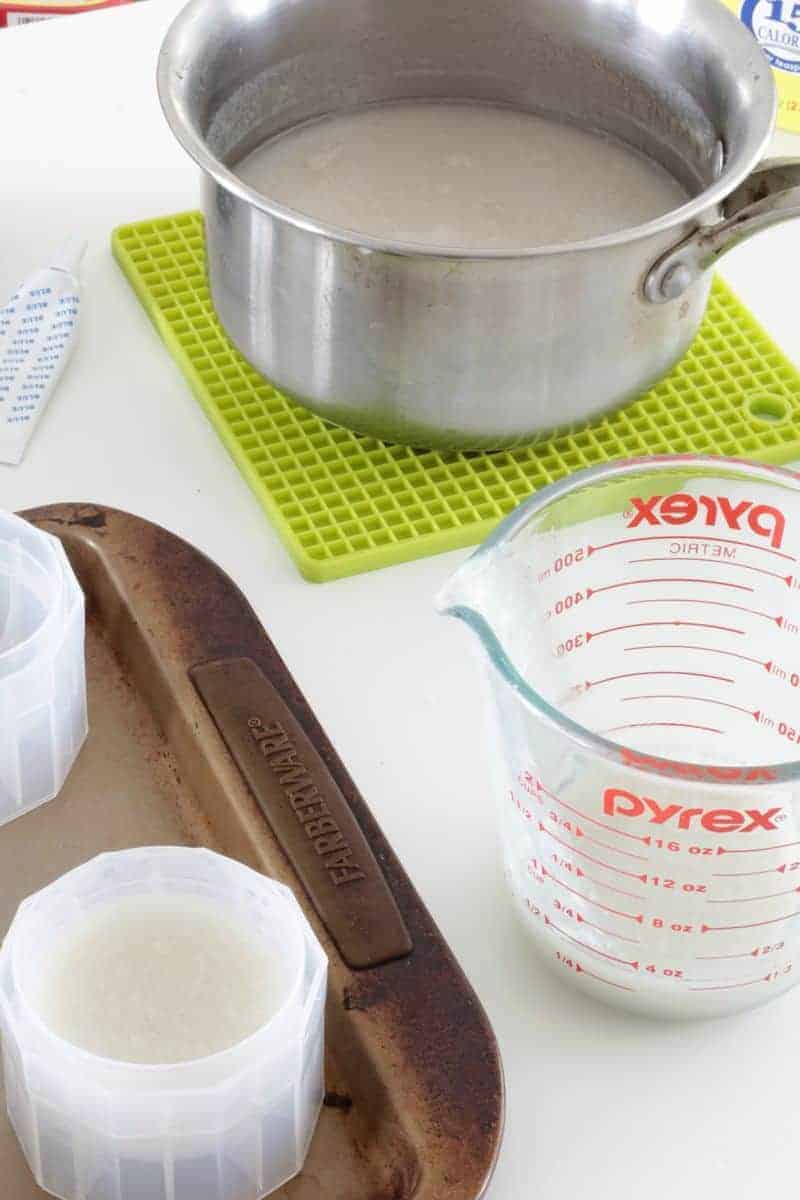
1. Assemble your ingredients and mix
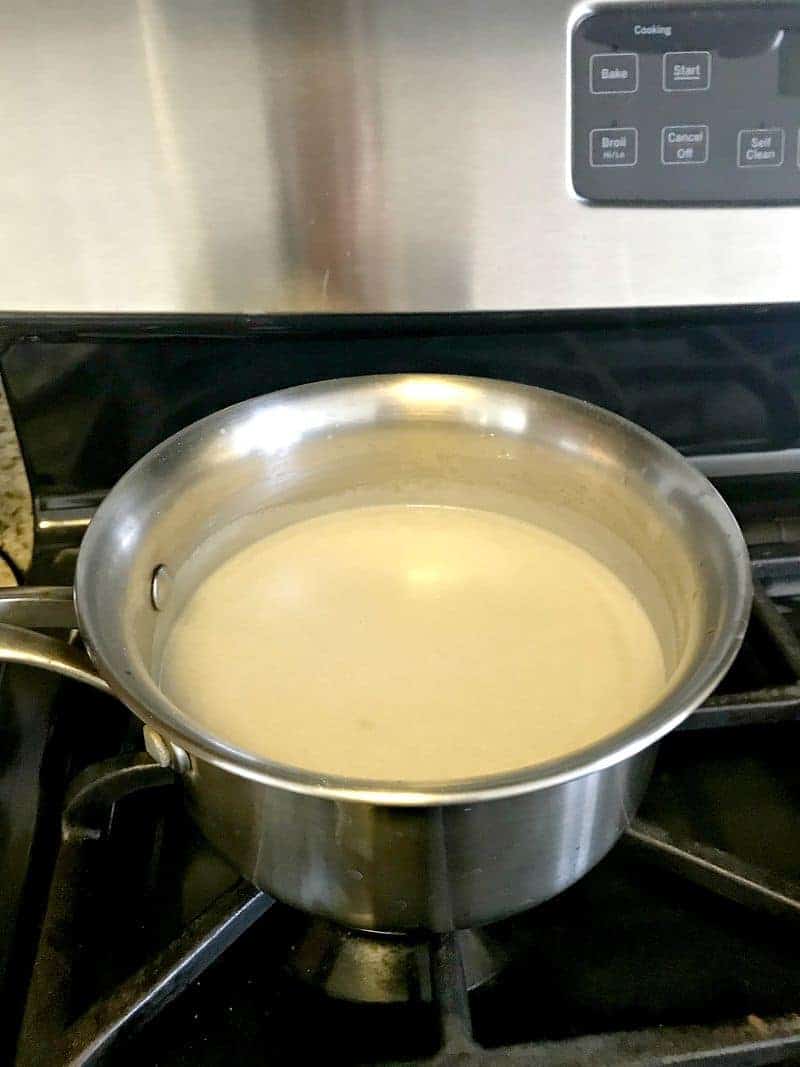
Open the can of coconut milk and pour it into a small saucepan. Add the water and stir to combine. Add the agar agar and whisk until the agar agar is fully combined into the coconut milk.
2. Heat up the liquid
Over medium-high heat, begin to heat up the mixture, turning the heat down to a gentle simmer immediately when the coconut milk comes to a boil.
3. Add the sugar
Add 1/2 cup sugar (or more, to taste) and whisk into the mixture until all the sugar is dissolved.
At this point, give the mixture a little taste and see if it is sweet enough for you (the big feedback in my eyeball recipe is it was not sweet enough but I find this cloyingly sweet to me already).
If it does not taste sweet enough, add sugar by the teaspoon until it is sweet enough, stir until dissolved, then remove from heat. Please make sure it is sweet enough before you start chilling your edible ornaments. Once you start chilling you cannot change the sweetness level.
4. Cool for 10 minutes then add to molds
Allow the agar agar mixture to cool for 10 minutes (I set a timer so I won’t forget). Place your open sphere molds on the cookie sheet so you can move them easily all at once.
After the mixture has cooled 10 minutes, measure out 1/3 cup of the white mixture and add 1/3 cup to each of the six sphere molds. This is your white layer. (You will still have 2 cups of the mixture left in the saucepan; leave it there.)
Place the sphere molds in the fridge without the lid for 20 minutes.
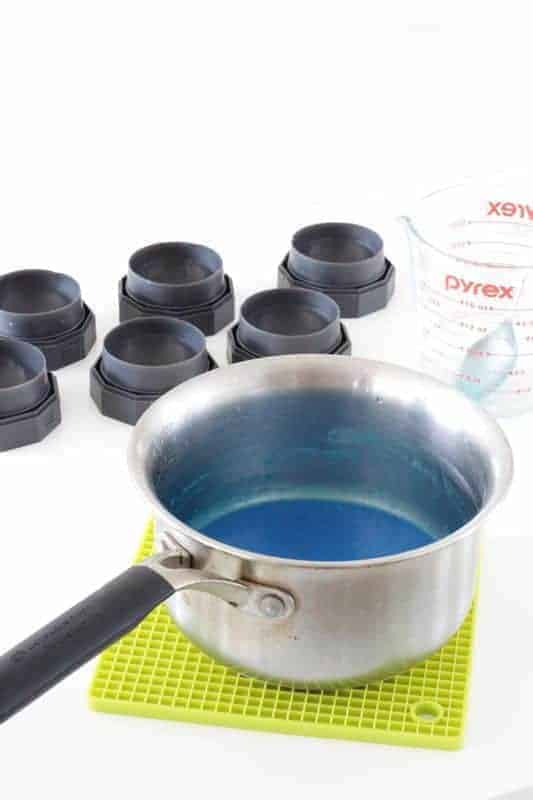
5. Make the blue layer
While the white layer is cooling in the fridge, take the remainder of the white mixture in the saucepan and place it over low heat and add your gel food coloring to it (whatever color you like).
The low heat is going to break up any setting of the agar agar so the food coloring can mix into it thoroughly.
I used blue and I didn’t measure. I just squirted it blithely in there and stirred, repeating until I was happy with the darkness level of the blue.
Once you are happy with the color, set aside until the white layer is cooled.
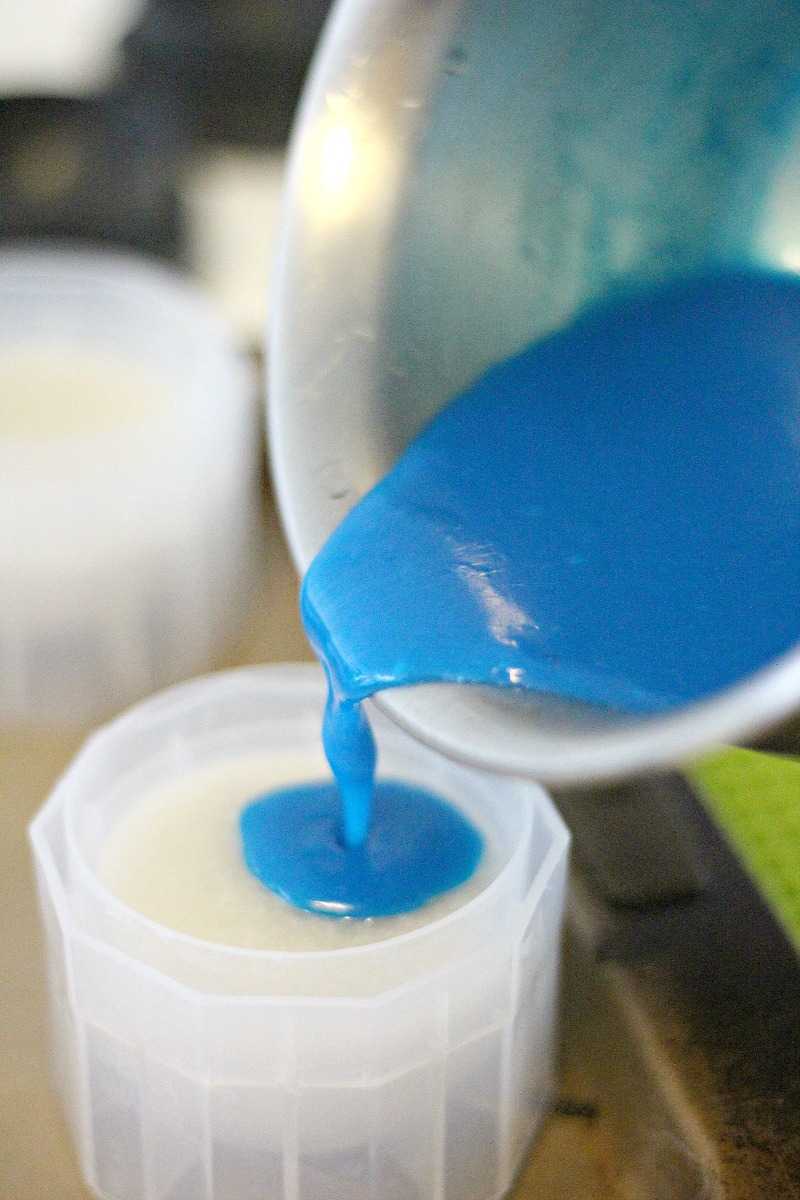
6. Add the blue layer
If the blue layer has set, reheat it gently until it is fully liquid again. At that point, remove the white layer of agar agar from the fridge and working quickly, add the blue layer evenly to the top of the white layers, so that all six molds have approximately equal levels.
(Fill it until the blue is just below the top of the mold edge! When you add the lid it is going to squeeze the liquid upwards and the air will zoom out of the tiny hole. you also want a little bit of space for the marbling to take place.)
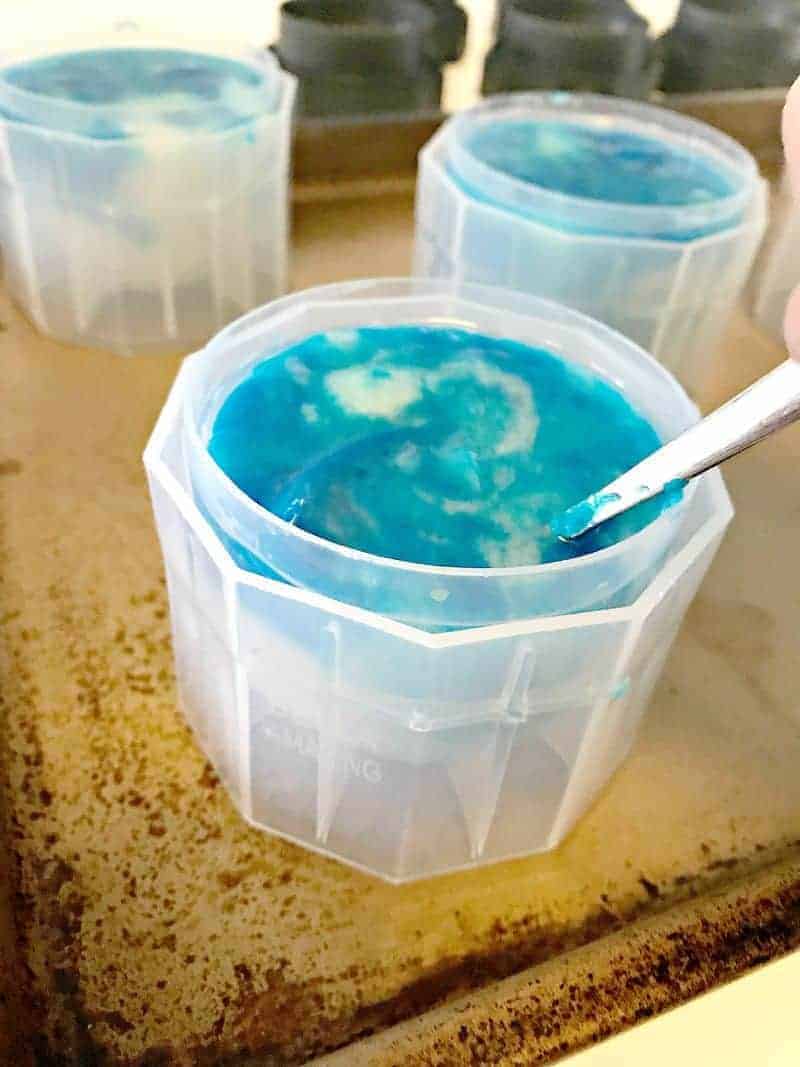
Moving quickly, use a spoon and smoosh the blue layer down the edges in places to get the marble effect. You can also insert the spoon in the center, scoop a small piece of the white layer, and move it towards the edge of the sphere mold, turning it as you go.
This is going to help get that marbled effect for your edible ornaments. Don’t stir, but try to flip white and blue parts gently until you get your desired effect.
(Please put more blue in your molds, taking it nearly to the top. I was too careful and didn’t add enough and my spheres were too flat. You will have some blue leftover and you can just put it in a cup or other mold for an extra.)
6. Close and place in the fridge
Once you get your edible ornaments looking how you like them, place the lids on top, compressing slowly and gently, and then place your ornaments in the refrigerator on the cookie sheet.
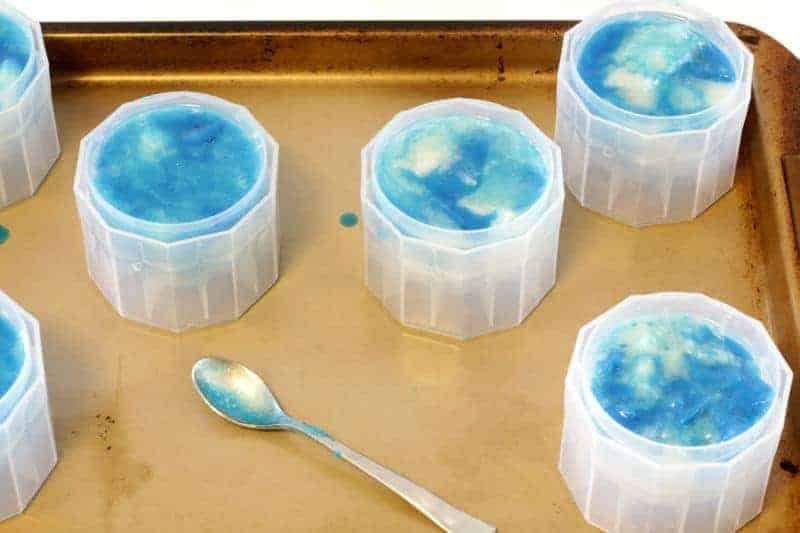
Allow your marbled ornaments to chill for several hours (around 3) or even overnight. When the ornament jellies have set completely, you can remove and serve!
I decorated my jellies with the tops of actual Christmas ornaments, cleaned of course. 😉
Hope you love your edible ornaments
Check out these other fun posts featuring the same sphere molds:
- Stunning ice balls filled with flowers — perfect for your drinks!
- It’s an obsession; I made marbled Jell-O for Earth Day.)
Pin this recipe!
Edible Ornaments: Marbled Christmas Ornament Jelly
These edible ornaments look just like real marbled ornaments, with a gorgeous blue and white marbled effect. Get this easy edible ornament recipe and make your own marbled Christmas ornament jellies, today!
Ingredients
- 2 cans coconut milk, unsweetened
- 2/3 cup water
- 1/2 cup white sugar
- blue gel food coloring
- 4 tsp agar agar
Instructions
Prepare the agar agar mixture
- Pour all the coconut milk and water in a medium saucepan (you want it to equal 4 cups, total). Add 4 tsp of agar agar and whisk until it is all incorporated into the coconut milk.
- Place over medium-high heat and bring to a gentle boil, reducing heat once it boils to bring it to a simmer.
- Add the 1/2 cup sugar and stir until all the sugar is dissolved. At this point, give the mixture a little taste and see if it is sweet enough for you. If not, add sugar by the tbsp until it is sweet enough, stir until dissolved, then remove from heat.
- Remove 1/3 cup of white mixture and pour into each of the six molds. Each mold should have 1/3 cup of the white layer. Put all molds into the refrigerator to cool for 20 minutes
Make the blue layer
- While the white layer is cooling, place the saucepan with the remainder of the white mixture over low heat again. There will be about 2 cups of the white mixture left.
- Add gel food coloring in the desired color until you get the color darkness level you want. Turn off heat and set aside.
Marbling
- When the white layer has cooled for 20 minutes, remove it from the fridge and, working quickly, add the blue layer evenly to the top of the white layers, so that all six molds have approximately equal levels. (If the blue layer has become solid, reheat for a few seconds to return to liquid again.)
- Moving quickly, use a spoon and smoosh the blue layer down the edges in places to get the marble effect. You can also insert the spoon in the center, scoop a small piece of the white layer, and move it towards the edge of the sphere mold, turning it as you go.
- This is going to help get that marbled effect for your edible ornaments. Don't stir, but try to flip white and blue parts gently until you get the desired effect.
- Once all the molds have been filled and marbled, place the lids carefully on each mold and press down gently. Put back in the fridge. You can place the last of the blue mixture in a separate mold for a different fun shape.
- Chill 3-4 hours until the edible ornaments are fully set. Remove and serve as desired.
Recommended Products
As an Amazon Associate and member of other affiliate programs, I earn from qualifying purchases.
-
 Agar Agar Powder- Thai Thailand Asian International Food 25g.x3packets.
 -
PREMIUM Ice Ball Molds (6-Pack), BPA Free 2.5 Inch Ice Spheres. Slow Melting Round Ice Cube Maker for Whiskey and Bourbon
-
Measuring Spoons: U-Taste 18/8 Stainless Steel Measuring Spoons Set of 7 Piece: 1/8 tsp, 1/4 tsp, 1/2 tsp, 3/4 tsp, 1 tsp, 1/2 tbsp & 1 tbsp Dry and Liquid Ingredients
Nutrition Information:
Yield: 6 Serving Size: 1Amount Per Serving: Calories: 80Total Fat: 2gSaturated Fat: 1gTrans Fat: 0gUnsaturated Fat: 0gCholesterol: 0mgSodium: 5mgCarbohydrates: 17gFiber: 0gSugar: 17gProtein: 0g
Renee Benes says
My kiddos would gobble these right up!
Marissa says
Try them! Very fun.
Crissy says
People will go craze-balls for these ornaments! Pinning and waiting for it to go viral.
Love that wooden backdrop, btw! 😉
Marissa says
Oh, I hope so! Thanks for sharing…wonder who I got that backdrop idea from, hmmmm? 😉
Julie Briones says
You are so smart and clever! I hope these ROCK Pinterest!
Marissa says
Me too boo!
Christene Holder says
This is the coolest idea!!! I love this!! Very clever for sure and I think these would be so fun for a party or just a small dinner too! Pinning
>> Christene
Keys to Inspiration
Marissa says
I think so too, Christene! I like fun stuff like this, glad you do too. 😉
Susan says
Love this idea, so much fun for a Christmas dinner party. Fun technique that can be use for a lot of holidays
Marissa says
Agreed, thanks for the visit!
Miz Helen says
This will be such a fun project, I can’t wait to try it! Hope you are enjoying your week and thanks so much for sharing with us at Full Plate Thursday!
Miz Helen
Marissa says
Thanks, for stopping by, Miz Helen1